How to Install a Beadboard Porch Ceiling
Learn how to install a beadboard porch ceiling with our step-by-step guide covering planning, materials, installation techniques, and finishing touches to create a beautiful, lasting outdoor ceiling that enhances your home's charm.
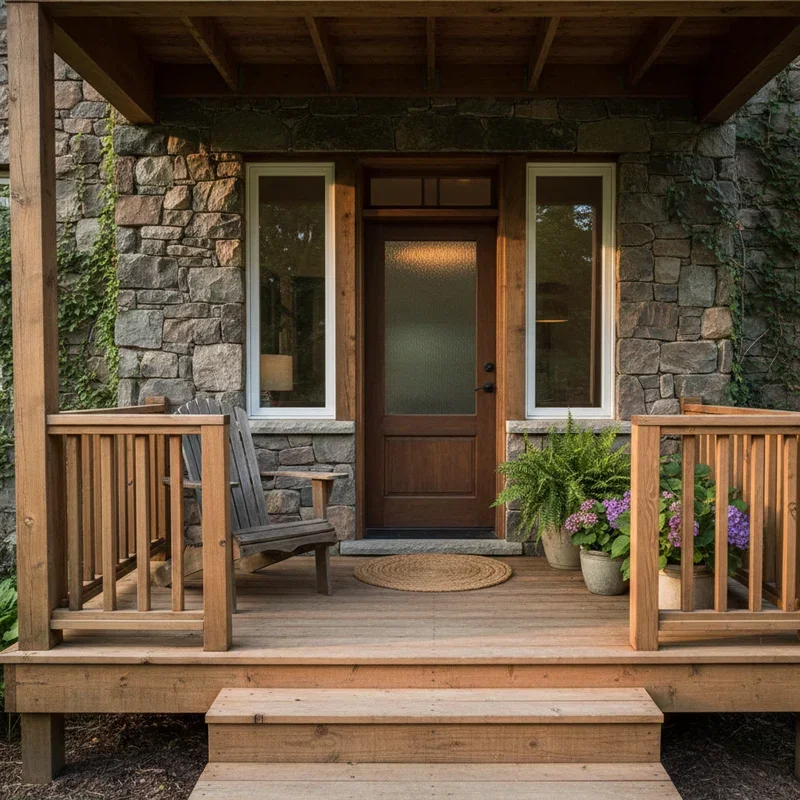
There's nothing quite like sitting on your porch on a lazy Sunday afternoon, iced tea in hand, while gazing up at a beautiful ceiling that you installed with your own two hands. Yep, that's right—a DIY porch ceiling can be a reality! If you've been staring at that worn-out, lackluster porch ceiling for too long, it's high time you considered beadboard as your go-to solution. Beadboard ceilings add character, boost your property's value, and can completely transform your outdoor living space without breaking the bank.
Let's face it, how to install a beadboard porch ceiling isn't common knowledge for most homeowners. The process might seem daunting at first glance, but with the right guidance (that's where I come in!), proper planning, and a free weekend, you'll be admiring your handiwork in no time. Whether you're a seasoned DIYer or a first-timer with a power drill, this comprehensive guide will walk you through every nail, panel, and finish coat needed to create a porch ceiling that'll make the neighbors green with envy.
So roll up those sleeves—we're about to dive headfirst into the wonderful world of beadboard ceilings!
What You'll Need: Tools and Materials Checklist
Before jumping into any project, gathering all your supplies is half the battle. Trust me, nothing's worse than being mid-installation and realizing you're missing something crucial!
Tools You'll Need
Tape measure
Pencil and chalk line
Safety glasses and dust mask
Circular saw or table saw
Jigsaw (for cutting around obstacles)
Drill with bits and screwdriver attachments
Nail gun with finishing nails
Hammer
Utility knife
Caulk gun
Putty knife
Sandpaper (100-grit and 220-grit)
Ladder or scaffolding
Level (at least 4 feet long)
Stud finder
Materials You'll Need
Beadboard panels or boards (measure your porch carefully!)
Moisture-resistant adhesive
Finishing nails (1½-inch)
Wood putty or filler
Caulk (paintable, exterior-grade)
Primer (exterior-grade)
Paint (exterior-grade)
Trim boards for edges
Wood preservative (for untreated wood)
Pro tip: Buy about 10% more beadboard than your measurements indicate—you'll thank me later when you make that inevitable cutting mistake!
Understanding Your Options: Types of Beadboard for Porch Ceilings
Before learning how to install a beadboard porch ceiling, let's explore your material options. Not all beadboard is created equal, folks!
Traditional Wood Beadboard
The classic choice. Solid wood beadboard offers authentic charm but requires more maintenance in outdoor applications.
Pros:
Beautiful natural grain pattern
Can be stained or painted
Authentic historical look
Cons:
More expensive
Susceptible to moisture damage
Requires more maintenance
PVC/Vinyl Beadboard
Perfect for high-moisture environments like covered porches.
Pros:
Completely waterproof
Low maintenance
Won't rot, warp, or crack
Typically comes with tongue-and-groove edges
Cons:
Limited staining options (primarily paintable)
Can look less authentic up close
May expand and contract with temperature changes
MDF Beadboard Panels
A budget-friendly option that works well in covered, protected porches.
Pros:
Most affordable option
Comes in large sheets for quicker installation
Smooth, consistent appearance
Cons:
Not suitable for highly humid areas
Less durable than other options
Must be thoroughly painted and sealed
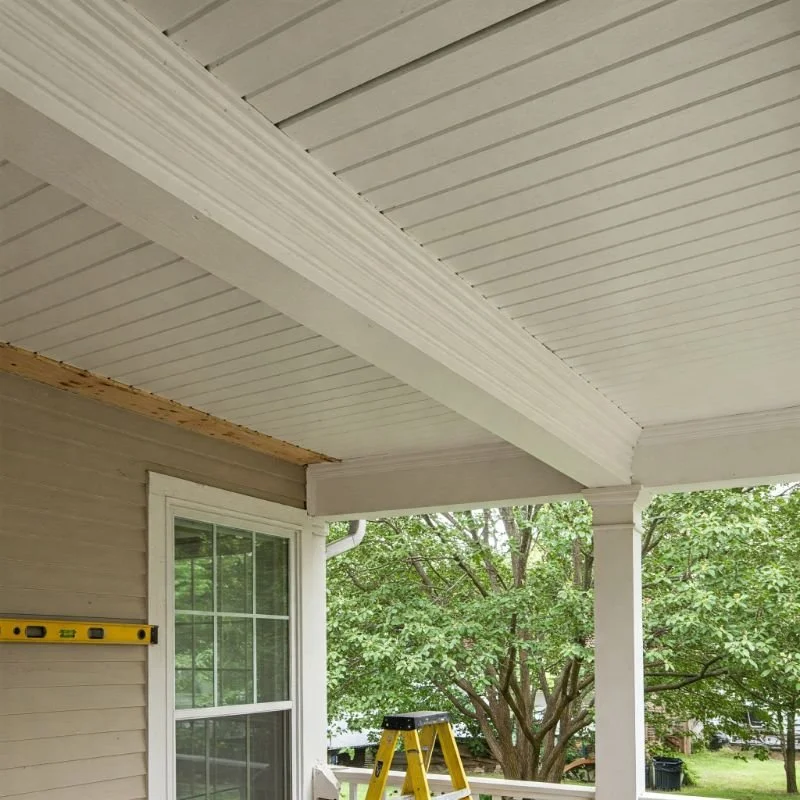
Preparation: The Foundation of a Successful Beadboard Ceiling
Ah, prep work—not the most exciting part, but skipping it is like trying to bake a cake without preheating the oven. It just won't turn out right!
Evaluating Your Existing Ceiling
First things first—what are you working with? Is your current ceiling:
Open rafters/joists (easiest to work with)
Damaged drywall or plaster (will need removal)
Solid and in good condition (can install directly over)
If you have damaged material, don't just cover it up! That's a recipe for disaster. Remove any water-damaged, moldy, or structurally compromised materials before proceeding.
Measuring and Planning
Measure twice, cut once—words to live by! Here's how to get accurate measurements:
Measure the length and width of your porch ceiling
Account for any obstacles like light fixtures or ceiling fans
Determine the direction you want the beadboard to run (typically perpendicular to joists)
Calculate total square footage and add 10% for waste
Creating a Layout Plan
Beadboard looks best when it's symmetrical. Nobody wants to end up with an awkward sliver of beadboard on one edge of the porch!
Find the center of your porch ceiling and mark it
Plan to work outward from the center in both directions
Calculate how many full boards you'll need
Determine if you'll need to trim the outer boards to maintain symmetry

How to Install a Beadboard Porch Ceiling: Step-by-Step Guide
Alright, enough with the prep—let's get down to business! Here's where the rubber meets the road (or where the beadboard meets the ceiling, in our case).
Step 1: Prepare Your Work Area
Remove any ceiling fixtures, fans, or lights
Cover your porch furniture or remove it
Set up your ladder or scaffolding for safe access
Ensure good lighting
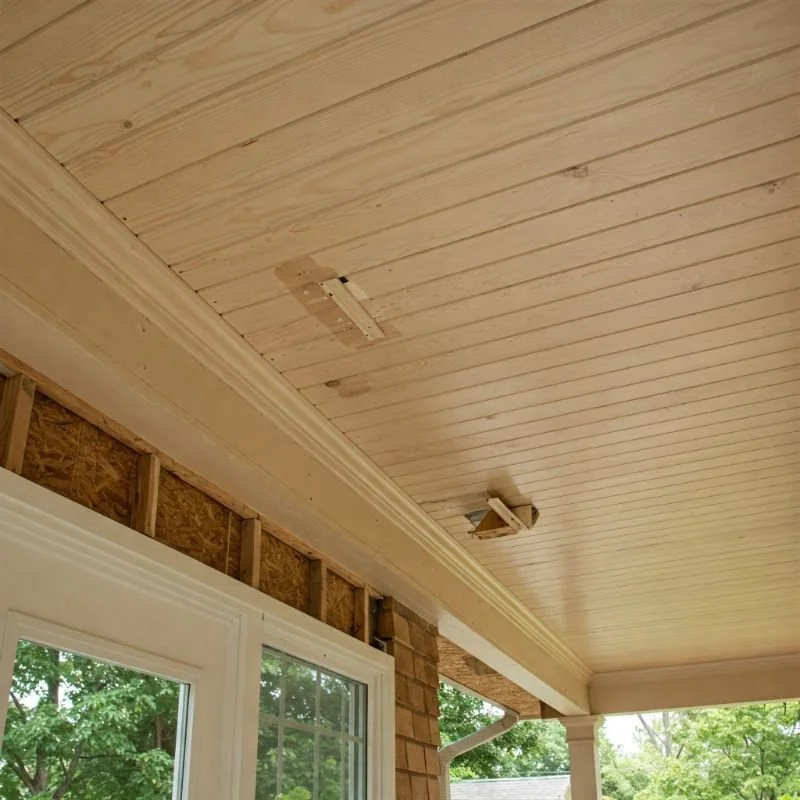
Step 2: Prepare the Ceiling Surface
If installing over existing ceiling:
Clean the surface thoroughly
Repair any cracks or holes with appropriate filler
Allow repairs to dry completely
Lightly sand the surface
If installing to open joists:
Ensure joists are level and structurally sound
Install any necessary blocking between joists for edge support
Mark joist locations with chalk line for easier nail placement
Step 3: Acclimate Your Beadboard
This step is often overlooked, but it's crucial! Wood and many composite materials need to adjust to the humidity and temperature of their environment.
Bring the beadboard to the porch at least 48 hours before installation
Stack it with spacers between sheets to allow air circulation
Keep it covered but not sealed in plastic
Step 4: Prepare Your Beadboard
For tongue-and-groove boards:
Cut the first board to length, leaving ¼ inch gap at all edges for expansion
Remove the tongue from the first board if it will be against a wall
For sheet panels:
Cut to size according to your layout plan
If needed, cut holes for light fixtures with a jigsaw
Prime all cut edges before installation (super important for moisture resistance!)
Step 5: Begin Installation
Starting at the center (or from one edge, if that makes more sense for your layout):
Apply construction adhesive to the back of the board/panel or directly to joists
Position board with proper expansion gap
Secure with finishing nails:
For tongue-and-groove: nail through the tongue at a 45-degree angle
For panels: nail directly through the panel into joists, spacing nails about 12 inches apart
Continue adding boards, ensuring tight seams between pieces
Step 6: Handle the Edges and Obstacles
For the final row, you may need to trim the width to fit
Cut carefully around any ceiling fixtures:
Mark the fixture location on the board
Drill a starter hole
Use a jigsaw to cut the opening slightly larger than needed
Step 7: Install Trim and Molding
This is where your ceiling goes from "nice" to "wow!"
Install crown molding or trim around the perimeter
Add any decorative trim where beadboard meets walls
For light fixtures, use ceiling medallions for a polished look
Finishing Your Beadboard Porch Ceiling
You're on the home stretch! Now let's make that ceiling look like it was installed by a pro.
Step 1: Fill Nail Holes
Use wood putty that matches your beadboard color
Apply with a putty knife, slightly overfilling each hole
Allow to dry completely
Sand smooth with fine-grit sandpaper
Step 2: Caulk Seams and Edges
Apply a thin bead of paintable exterior caulk where:
Beadboard meets trim
Beadboard meets walls
Between beadboard sheets (if using panels)
Smooth with a wet finger or caulk tool
Wipe excess with a damp cloth
Allow to dry completely
Step 3: Prime and Paint
Even pre-primed beadboard needs a good coat of primer on site!
Apply exterior-grade primer to all surfaces
Allow to dry completely (usually 24 hours)
Apply at least two coats of high-quality exterior paint
Use a paint specifically formulated for ceilings
Consider a paint with mildew-resistant properties
Pro tip: A soft roller with a small nap (¼ inch) works best for beadboard, reaching into the grooves without leaving excess paint that can puddle.

Maintaining Your Beautiful Beadboard Porch Ceiling
Congratulations! You've successfully learned how to install a beadboard porch ceiling. But the journey doesn't end here—proper maintenance will ensure your ceiling looks fantastic for years to come.
Routine Cleaning
Dust with a soft brush attachment on your vacuum
Wipe with a barely damp cloth every few months
Check for cobwebs in corners and crevices
Annual Inspection
Once a year, give your ceiling a thorough once-over:
Look for any water stains or discoloration
Check for loose boards or nails
Examine caulking for cracks or separations
Touch up paint as needed
Long-Term Care
Repaint every 5-7 years, or sooner if you notice fading or peeling
Replace any damaged boards promptly to prevent moisture intrusion
Re-caulk as needed to maintain watertight seals
Conclusion
Well, there you have it—everything you need to know about how to install a beadboard porch ceiling. What started as a daunting project has hopefully transformed into an achievable weekend task. Remember, the key to success lies in thorough preparation, quality materials, and patient execution. Don't rush the process; each step builds on the last. Your new beadboard ceiling will not only enhance your porch's appearance but also increase your home's value and your pride of ownership. So grab those tools, pick out your beadboard, and get ready to create a ceiling that'll have you looking up in admiration for years to come!
Read next: 15 Haint Blue Porch Ceiling Ideas You’ll Love
Frequently Asked Questions
Q1: Can I install beadboard over popcorn ceiling texture?
A: It's possible, but not ideal. Your best bet is to scrape off the popcorn texture first for a smooth surface. Otherwise, install furring strips to create a flat mounting surface.
Q2: How do I handle electrical boxes for lights and fans?
A: Extend any electrical boxes before installing beadboard so they'll be flush with the new ceiling surface. Special extender rings are available at most hardware stores for this purpose.
Q3: Should beadboard run parallel or perpendicular to my house?
A: Traditionally, beadboard runs perpendicular to the house (from the house toward the outer edge of the porch). However, running it parallel to the house can make the porch appear wider. Choose what works best for your space!
Q4: What's the best paint finish for a porch ceiling?
A: Satin or semi-gloss finishes work best. They're more durable and easier to clean than flat paint, but not so glossy that they show every imperfection.
Q5: Can I install a beadboard ceiling by myself?
A: While possible, this is definitely a project where having a helper makes a huge difference, especially when handling full sheets or long boards overhead..
Stay up to date with our latest ideas!