How to Install Outdoor Tile Over Concrete Surface
Master outdoor tile installation over concrete with our step-by-step guide. Get pro tips, tools needed, and troubleshooting advice.
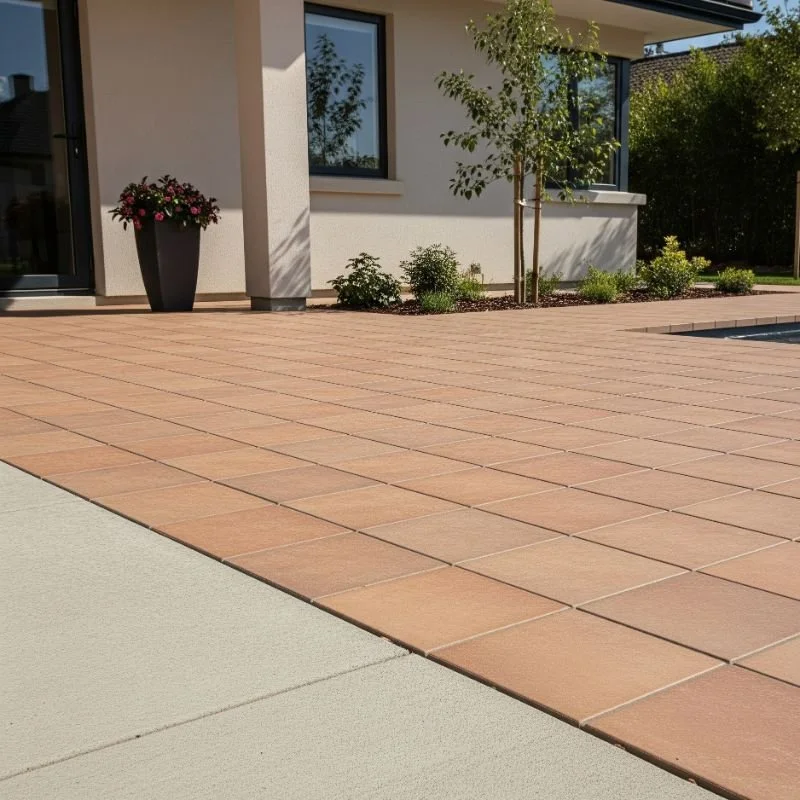
Well, hello there, fellow DIY enthusiast! So you've got yourself a boring concrete patio or walkway that's about as exciting as watching paint dry? Don't worry, we've all been there. That dull, gray slab might be functional, but it's certainly not winning any beauty contests anytime soon. Here's the good news though - transforming that plain concrete surface into a stunning outdoor space with beautiful tiles isn't as complicated as you might think!
Installing outdoor tiles over concrete can absolutely revolutionize your outdoor living area, turning it from drab to fab faster than you can say "home improvement project." Whether you're dreaming of a Mediterranean-inspired patio, a sleek modern deck, or a rustic stone pathway, the right tiles can make all the difference. Plus, there's something incredibly satisfying about stepping back and admiring your handiwork when the job's done. Trust me, your neighbors are going to be green with envy!
Planning Your Outdoor Tile Project
Choosing the Right Tiles for Your Space
Now, before you get all excited and start picking out pretty patterns, let's talk about choosing the right tiles for your outdoor adventure. Not all tiles are created equal, especially when it comes to dealing with Mother Nature's mood swings!
You'll want to look for tiles specifically rated for outdoor use. These bad boys are designed to handle everything from scorching summer heat to freezing winter temperatures without cracking or fading. Here's what to keep your eyes peeled for:
• Porcelain tiles - These are your heavy-duty champions, perfect for high-traffic areas
• Natural stone - Think travertine, slate, or granite for that authentic, earthy vibe
• Ceramic tiles - Budget-friendly options that still pack a punch in the durability department
• Concrete tiles - Modern, industrial look that's surprisingly versatile
The key thing to remember? Make sure whatever you choose has a slip-resistant surface. Nobody wants their outdoor oasis turning into a slip-and-slide disaster zone when things get wet!
Measuring and Calculating Materials
Alright, time to put on your math hat! Don't worry, it's not rocket science, but getting your measurements right will save you from those dreaded extra trips to the home improvement store.
Start by measuring your concrete surface area. Length times width gives you your square footage, but here's a pro tip: always add about 10-15% extra for cuts, breakage, and those inevitable "oops" moments. Better to have too much than to be stuck with a partially finished project because you ran out of tiles!
Essential Tools and Materials for Success
Your DIY Arsenal
Before diving headfirst into this project, let's make sure you've got all the right tools in your toolbox. There's nothing more frustrating than getting halfway through a job only to realize you're missing something crucial.
Here's your shopping list for success:
Tools you'll absolutely need: • Tile spacers (trust me, eyeballing it never works out well) • Rubber mallet (for gentle persuasion) • Level (because wonky tiles are nobody's friend) • Tile cutter or wet saw • Notched trowel for spreading adhesive • Rubber float for grouting • Buckets for mixing • Measuring tape and chalk line • Safety gear (goggles, gloves, knee pads)
Materials that'll make or break your project: • Outdoor tile adhesive (don't cheap out on this!) • Waterproof grout suitable for outdoor use • Grout sealer • Tile primer (if needed) • Concrete cleaner or degreaser
Preparing Your Concrete Surface Like a Pro
Cleaning and Assessment
Here's where the rubber meets the road, folks! A successful tile installation starts with proper surface preparation. Think of it like painting a wall - you wouldn't slap paint over dirt and grime, right?
First things first, give that concrete a thorough cleaning. I'm talking about a deep clean that would make your grandmother proud. Start by sweeping away all loose debris, then break out the pressure washer if you've got one. If not, a stiff brush and some concrete cleaner will do the trick.
Pay special attention to any oil stains, paint spills, or other stubborn spots. These need to come off completely because they can interfere with adhesive bonding. Sometimes you might need to use a concrete degreaser or even muriatic acid for really tough stains (just make sure you're wearing proper protection and following all safety guidelines).
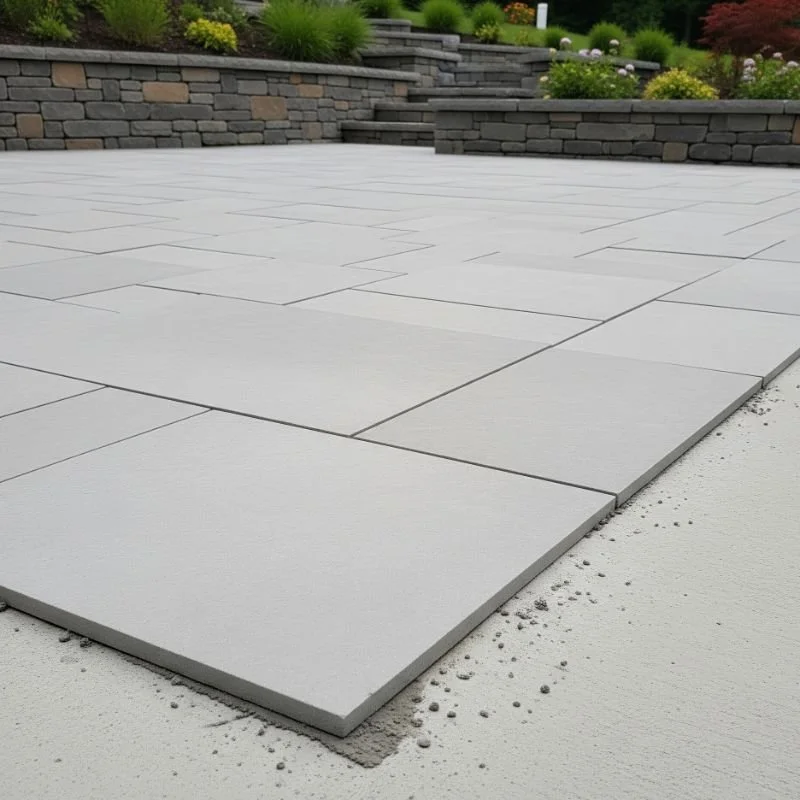
Checking for Cracks and Imperfections
Now comes the detective work! Walk around your concrete surface and look for any cracks, holes, or uneven spots. Even small imperfections can cause big problems down the road, so don't ignore them.
For hairline cracks, you can usually fill them with a concrete crack filler. Larger cracks or holes might need some concrete patching compound. The goal is to create a smooth, level surface that's ready to receive your beautiful new tiles.
If your concrete has a lot of damage or severe unevenness, you might need to consider applying a concrete overlay or self-leveling compound. It's a bit more work upfront, but it'll save you headaches later.
Step-by-Step Installation Process
Creating Your Layout Pattern
Okay, this is where things start getting exciting! Before you start slapping tiles down willy-nilly, you need to plan your layout. This step can make the difference between a professional-looking job and something that screams "amateur hour."
Start by finding the center point of your space and work outward from there. This helps ensure your pattern looks balanced and any cut tiles at the edges are roughly the same size. Use a chalk line to mark your starting point and create reference lines.
Here's a neat trick: lay out a dry run first! Place tiles without adhesive to see how everything fits together. This gives you a chance to make adjustments and figure out where you'll need to make cuts. It's much easier to move tiles around now than after you've committed with adhesive!
Mixing and Applying Adhesive
Time to get your hands dirty! Mixing tile adhesive properly is crucial for a lasting installation. Follow the manufacturer's instructions to the letter - they know their product better than anyone.
When it comes to applying adhesive, less is more... well, sort of. You want good coverage, but too much adhesive can cause tiles to sit unevenly or squeeze up between joints. Use your notched trowel to spread the adhesive in smooth, even strokes, creating consistent ridges.
Work in small sections - only spread as much adhesive as you can tile in about 15-20 minutes. Adhesive has a working time, and you don't want it skinning over before you get your tiles down.
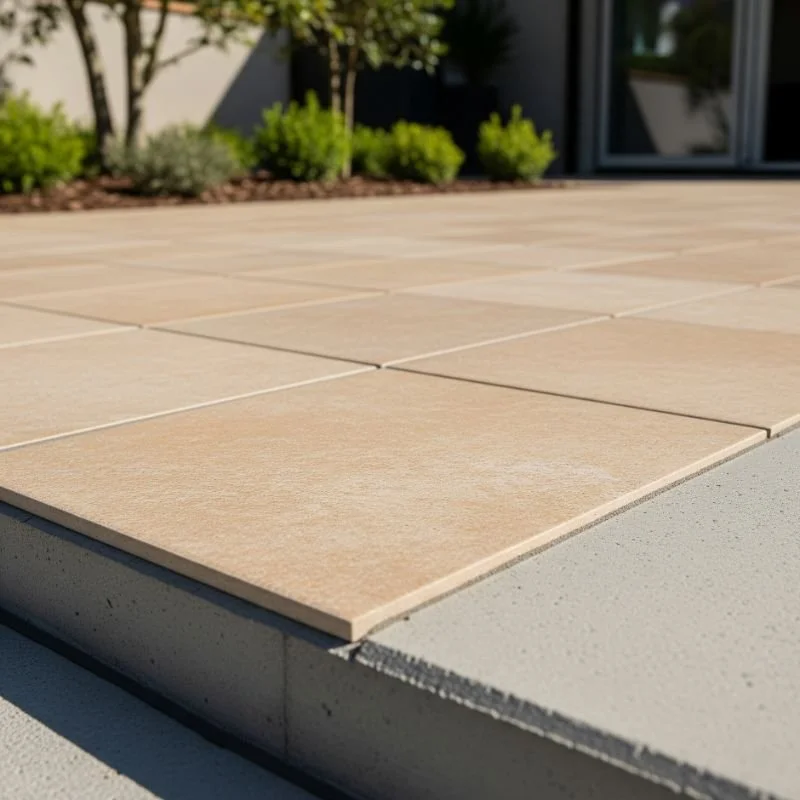
Setting Tiles with Precision
Here's where the magic happens! Starting from your center point, begin setting tiles one by one. Press each tile firmly into the adhesive with a slight twisting motion to ensure good contact.
Use your tile spacers religiously - they're your best friend for maintaining consistent gaps between tiles. These gaps aren't just for looks; they're essential for allowing the tiles to expand and contract with temperature changes.
Check your work frequently with a level to make sure everything's staying flat and even. If a tile sits too high, tap it gently with your rubber mallet. If it's too low, pull it up, add more adhesive, and reset it.
The Complete Guide to How to Install Outdoor Tile Over Concrete Surface
Advanced Techniques for Tricky Situations
Sometimes your concrete surface throws you a curveball. Maybe you're dealing with a sloped area for drainage, or perhaps you need to work around existing fixtures like drains or posts. Don't panic! These situations just require a bit more planning and creativity.
For sloped surfaces, you'll need to maintain consistent tile spacing while following the slope. This might mean cutting tiles at angles or using wedge-shaped spacers. The key is maintaining the appearance of straight lines even when following a slope.
When working around obstacles, measure twice and cut once! Create cardboard templates for complex cuts, and don't be afraid to take your time. A perfect fit around a drain or post is worth the extra effort.
Dealing with Weather Challenges
Mother Nature doesn't always cooperate with our DIY schedules, does she? Temperature and humidity can significantly affect your tile installation, so timing is everything.
Avoid installing tiles in extreme temperatures - too hot and your adhesive might set too quickly; too cold and it might not cure properly. The sweet spot is usually between 50-85°F with moderate humidity.
If rain threatens, have a plan! Cover your work area with plastic sheeting, and don't start new sections if there's a chance of precipitation within the next 24 hours.
Grouting and Finishing Touches
Grout Selection and Application
Choosing the right grout is almost as important as choosing the right tiles. For outdoor applications, you'll want a grout that can handle temperature fluctuations and moisture without cracking or staining.
Epoxy grouts are the gold standard for outdoor use - they're waterproof, stain-resistant, and incredibly durable. However, they're also more challenging to work with and more expensive. Polymer-modified cement grouts are a good middle ground, offering excellent performance at a more reasonable price point.
When applying grout, work diagonally across the tiles to ensure complete joint filling. Use your rubber float to press grout deep into the joints, then scrape off excess with the float held at a 45-degree angle.
Cleanup and Sealing
The cleanup phase is where patience really pays off. Work in sections, cleaning grout haze from tile surfaces before it has a chance to harden completely. Use a slightly damp sponge and rinse it frequently in clean water.
Once everything's clean and the grout has cured (usually 24-48 hours), apply a quality grout sealer. This extra step will protect your investment by preventing stains and moisture penetration.
Maintenance Tips for Long-Lasting Results
Regular Care Routines
Congratulations! You've successfully transformed your boring concrete into a beautiful tiled surface. Now, let's talk about keeping it looking fantastic for years to come.
Regular maintenance is pretty straightforward - sweep regularly to prevent debris buildup, and clean with a mild detergent and water as needed. Avoid harsh chemicals or abrasive cleaners that might damage the tile or grout.
Pay attention to the grout lines, as they're usually the first place problems develop. If you notice any cracks or missing grout, address them promptly to prevent water damage.
Seasonal Considerations
Different seasons bring different challenges for outdoor tiles. In winter, avoid using deicing salts that can damage tiles and grout. Instead, use sand for traction or look for ice melts specifically designed for use on tile surfaces.
During heavy rain seasons, make sure your drainage is working properly. Standing water can eventually find its way under tiles and cause problems with the adhesive bond.
Troubleshooting Common Installation Issues
When Things Don't Go According to Plan
Even with the best planning, sometimes things go sideways. Don't worry - most problems have solutions, and many can be fixed without starting over completely.
If you notice tiles becoming loose after installation, it's usually an adhesive issue. This could be due to contamination on the concrete surface, expired adhesive, or improper mixing. The fix usually involves removing the affected tiles, cleaning the area thoroughly, and reinstalling with fresh adhesive.
Uneven tiles can often be corrected by adjusting the adhesive bed or using tile leveling systems. These handy devices help maintain consistent tile height across large areas.
Professional Help vs DIY Solutions
While most homeowners can successfully complete this project, there are times when calling in a professional makes sense. If you're dealing with a large area, complex drainage issues, or expensive tiles, the cost of professional installation might be worth the peace of mind.
However, for most standard patios and walkways, this is absolutely a doable DIY project. Take your time, follow the steps carefully, and don't be afraid to ask for advice at your local tile shop.
Conclusion
Mastering how to install outdoor tile over concrete surface isn't just about following steps - it's about transforming your outdoor space into something truly spectacular. With proper preparation, the right materials, and a bit of patience, you'll create a durable, beautiful surface that'll be the envy of the neighborhood. Remember, taking your time during each phase pays dividends in the long run. From surface prep to that final grout seal, every detail matters in creating a professional-looking installation that'll stand the test of time and weather.
Read next: How to Clean an Outdoor Rug in 5 Easy Steps
Frequently Asked Questions
1. What's the best adhesive for outdoor tile installation over concrete?
Use polymer-modified thin-set adhesive specifically rated for exterior applications and concrete substrates.
2. How long should I wait before walking on newly installed tiles?
Wait at least 24 hours before light foot traffic, 48-72 hours for normal use.
3. Can I install tiles directly over painted concrete surfaces?
No, paint must be completely removed as it prevents proper adhesive bonding.
4. What's the minimum temperature for outdoor tile installation?
Install when temperatures are consistently between 50-85°F for optimal adhesive curing conditions.
5. How do I prevent tiles from cracking in freeze-thaw cycles?
Choose freeze-thaw resistant tiles and ensure proper drainage to prevent water accumulation.
Stay up to date with our latest ideas!