15 Inexpensive Stepping Stone Walkway Ideas to Try
Create stunning garden paths with 15 affordable stepping stone ideas using recycled materials, DIY techniques, and creative designs under $100.

Ever walked through a gorgeous garden and thought, "I'd love a path like that, but my bank account just laughed at me?" Well, prepare for your wallet to stop giggling because creating a stunning stepping stone walkway doesn't require selling your firstborn! Whether you're tired of muddy shoes, want to jazz up your garden, or simply love the sound of "oohs" and "ahhs" from visitors, these budget-friendly ideas will transform your yard from "meh" to "magnificent." Think of stepping stones as your garden's jewelry: they add sparkle, guide the way, and make everything look more put-together. From repurposed materials that would make Mother Earth proud to creative DIY solutions that'll have Pinterest begging for your secrets, we're about to embark on a journey where champagne taste meets beer budget. Ready to step up your garden game without stepping on your finances? Let's rock and roll!
1. Recycled Concrete Pieces
Turn construction waste into garden gold by salvaging broken concrete from demolition sites or your own driveway repairs! These irregular chunks create rustic charm while costing absolutely nothing. Contact local contractors who often pay to dispose of concrete debris and would happily let you haul it away free. Arrange pieces like a jigsaw puzzle, leaving gaps for moss or ground cover to grow between. The varied sizes and shapes add natural appeal that manufactured stones can't match. Level each piece carefully in a sand base for stability. The weathered surfaces blend seamlessly with established gardens while the substantial weight ensures they won't shift. Seal surfaces if desired for easier cleaning, though the natural patina develops beautiful character over time.
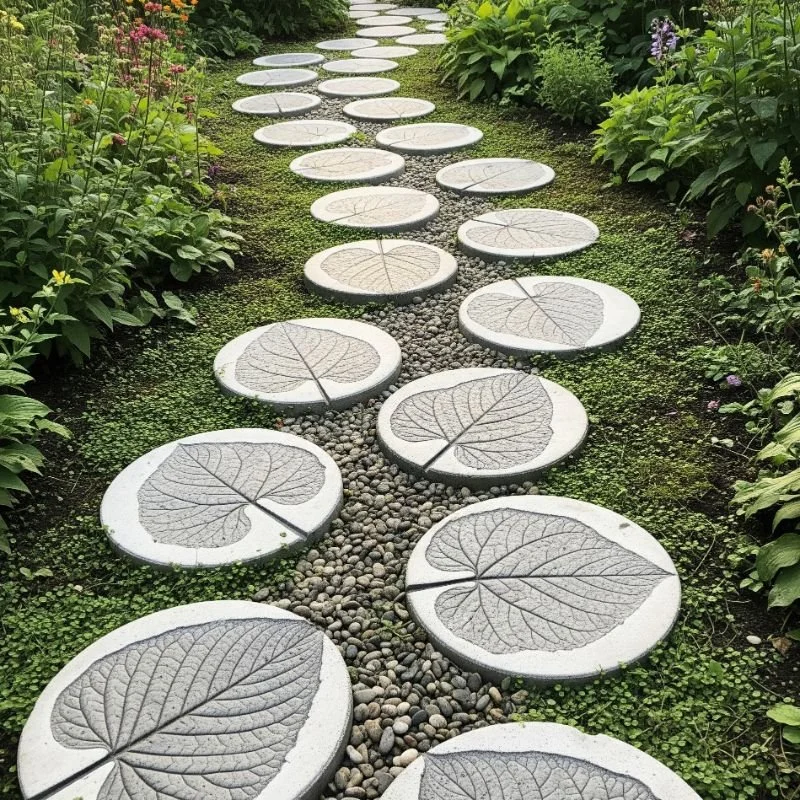
2. DIY Concrete Leaf Imprints
Create botanical masterpieces by using large leaves as molds for concrete stepping stones that cost under $3 each! Mix basic concrete according to package directions, spread onto plastic-covered cardboard, and press elephant ear or rhubarb leaves for stunning natural impressions. The veining details transfer beautifully, creating artistic stones unique to your garden. Remove leaves after concrete sets but before fully curing for clearest patterns. Add concrete dye for colored stones or leave natural gray for classic appeal. These lightweight stones work perfectly for decorative paths through flower beds. Kids love helping with this project, making it a fun family weekend activity. Each stone becomes a garden sculpture that happens to be functional too.
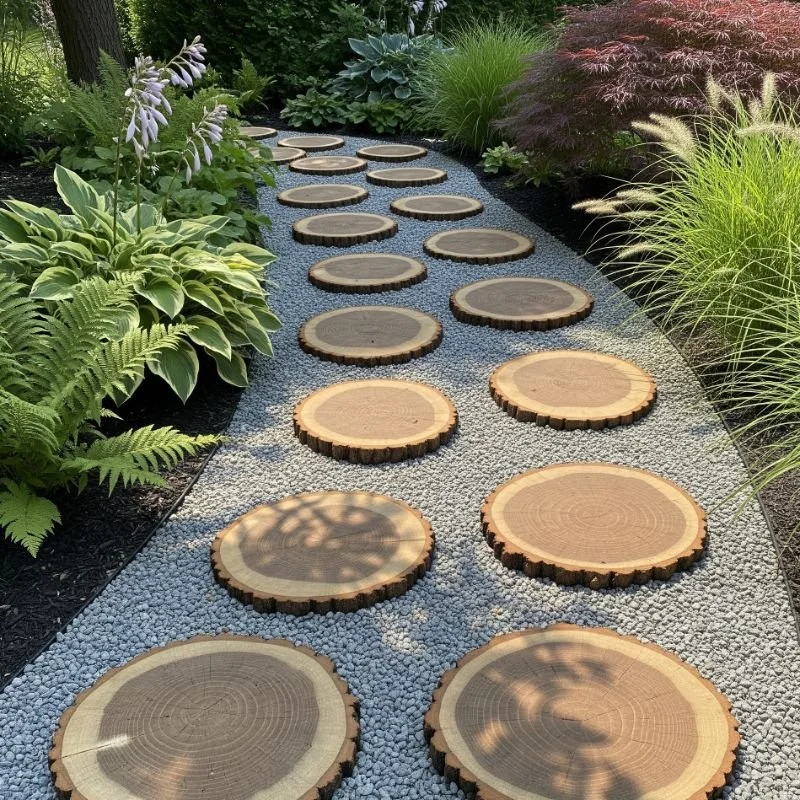
3. Wood Slice Stepping Stones
Transform fallen trees into rustic pathway charm by cutting logs into 2-3 inch thick rounds for natural stepping stones! Check with local tree services who often give away wood from removed trees. Treat slices with wood preservative to extend lifespan, especially in damp climates. The natural grain patterns create unique designs while bark edges add textural interest. Arrange various sizes for organic flow or uniform cuts for formal appearance. These work beautifully in woodland gardens or to connect deck areas with natural spaces. Replace individual slices as needed rather than entire pathways. The wood develops silver-gray patina over time, enhancing the weathered appeal. Cost stays minimal when sourcing free wood, with only preservative as expense. Before installing new landscaping features, stump grinding can be an effective way to clear old tree remnants and create a more usable outdoor space.
4. Painted Concrete Pavers
Transform boring gray pavers into artistic statements with concrete paint or stain that costs less than $20 per gallon! Basic concrete pavers often go on sale for under $1 each, providing perfect canvases for creativity. Create patterns like faux tile, geometric designs, or even painted "rugs" along your pathway. Use stencils for uniform looks or freehand for artistic expression. Seal painted surfaces with concrete sealer for weather resistance and longevity. This technique allows complete customization to match home colors or garden themes. Change designs seasonally if desired since repainting is simple and affordable. Kids can paint their own stones for personalized garden corners. The transformation from plain to spectacular happens in just one weekend afternoon.
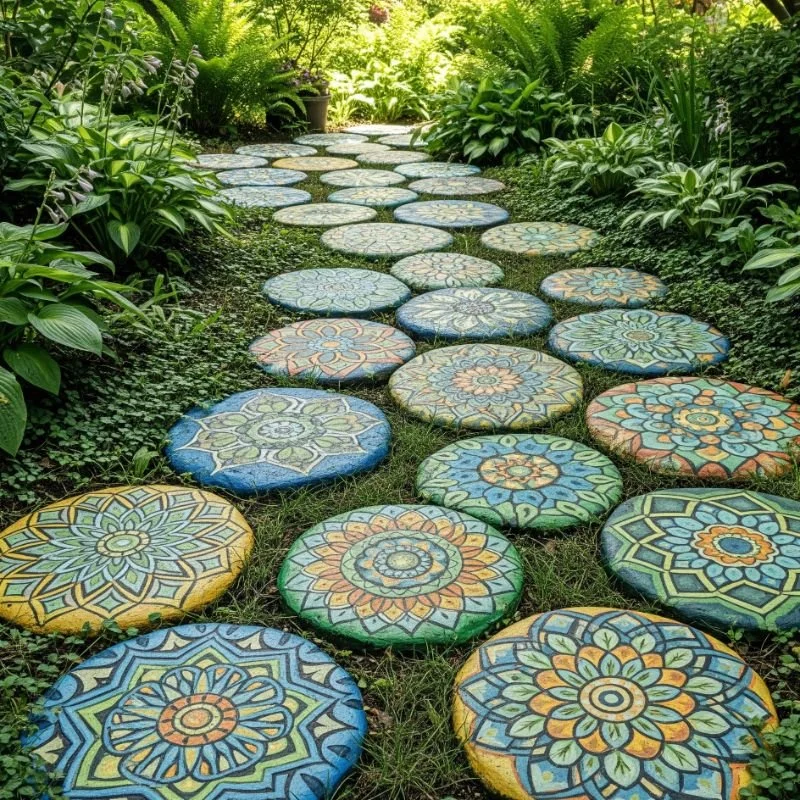
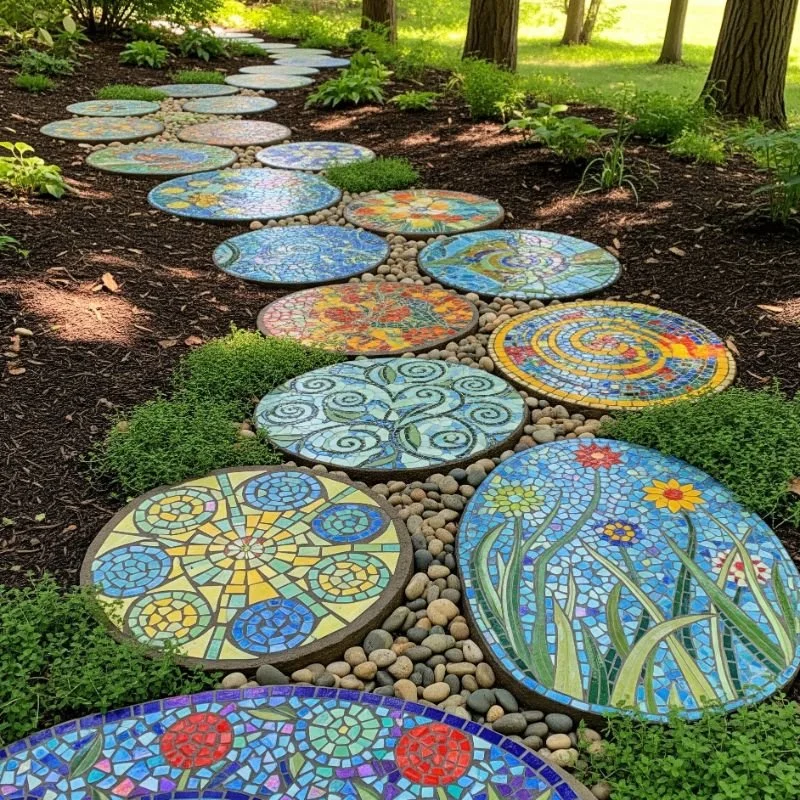
5. Mosaic Tile Creations
Turn broken dishes, tiles, and glass into stunning mosaic stepping stones that rival expensive artistic pieces! Collect materials from thrift stores, garage sales, or your own kitchen accidents. Press pieces into wet concrete poured in pizza pans or plant saucers for perfect circles. Arrange by color for patterns or randomly for eclectic charm. The smooth surfaces feel wonderful underfoot while colors catch sunlight beautifully. Grout between pieces for professional finish or leave concrete visible for rustic appeal. Each stone becomes unique artwork costing under $5 in materials. This technique works especially well near pools or water features where the glass sparkles. Friends will beg to contribute their broken china to your pathway project.
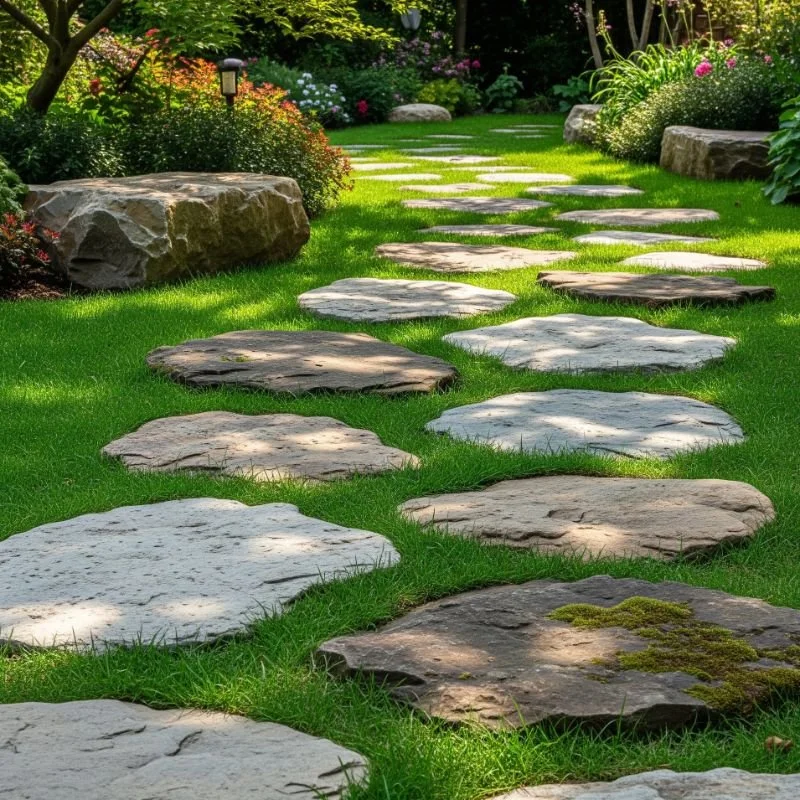
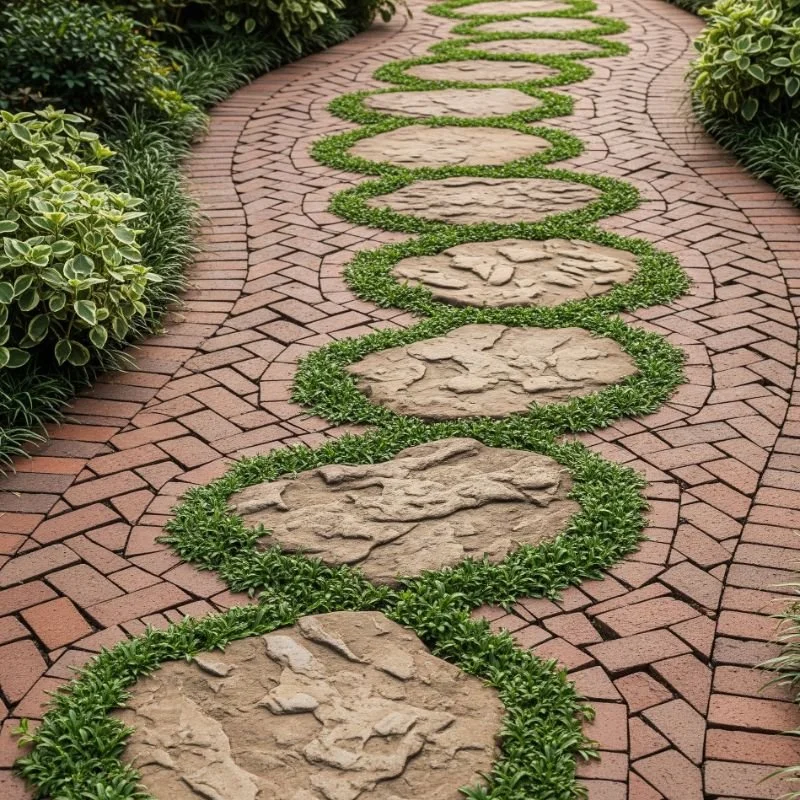
6. Natural Flat Stones
Scout local creeks, fields, or landscape supply "seconds" piles for natural flat stones at fraction of retail prices! Many suppliers have imperfect pieces they sell cheaply or give away. Look for stones 2-3 inches thick with relatively flat surfaces for comfortable walking. Mix sizes and colors for natural appearance or sort by type for uniform design. Set in sand for easy leveling and adjustment as ground settles. The authentic stone lasts forever with zero maintenance beyond occasional sweeping. Natural variations in color and texture create interest without trying. This option particularly suits homes with stone features or natural landscape designs. Gathering stones becomes treasure hunt adventure for the whole family.
7. Brick Pattern Pathways
Reclaim old bricks from demolished buildings or buy seconds from brick suppliers for authentic pathways under $50! Salvaged bricks offer instant character with their weathered surfaces and color variations. Arrange in classic patterns like herringbone or basketweave for timeless appeal. The uniform size makes installation straightforward while allowing creative pattern play. Set in sand base for proper drainage and easy future adjustments. Mixed brick colors create mosaic effects without mosaic work. This durable option handles heavy traffic while improving with age. Many demolition companies give away old bricks to avoid disposal fees. Clean with wire brush and water before installation. The result looks like expensive professional hardscaping at DIY prices.
8. Plastic Mold Stepping Stones
Invest $15-20 in reusable plastic molds to create unlimited stepping stones from concrete bags costing $5 each! One mold produces dozens of stones over time, dropping per-stone cost to pennies. Choose from various patterns including cobblestone, fieldstone, or geometric designs. Mix concrete, pour into mold, and release when set for instant pathway pieces. Add color or texture materials before concrete sets for customization. The uniform shapes create professional-looking paths that fool visitors into thinking you hired landscapers. Make stones as needed, storing molds between projects. This method offers consistency impossible with found materials while maintaining budget friendliness. Share molds with neighbors to split initial cost and build community connections.
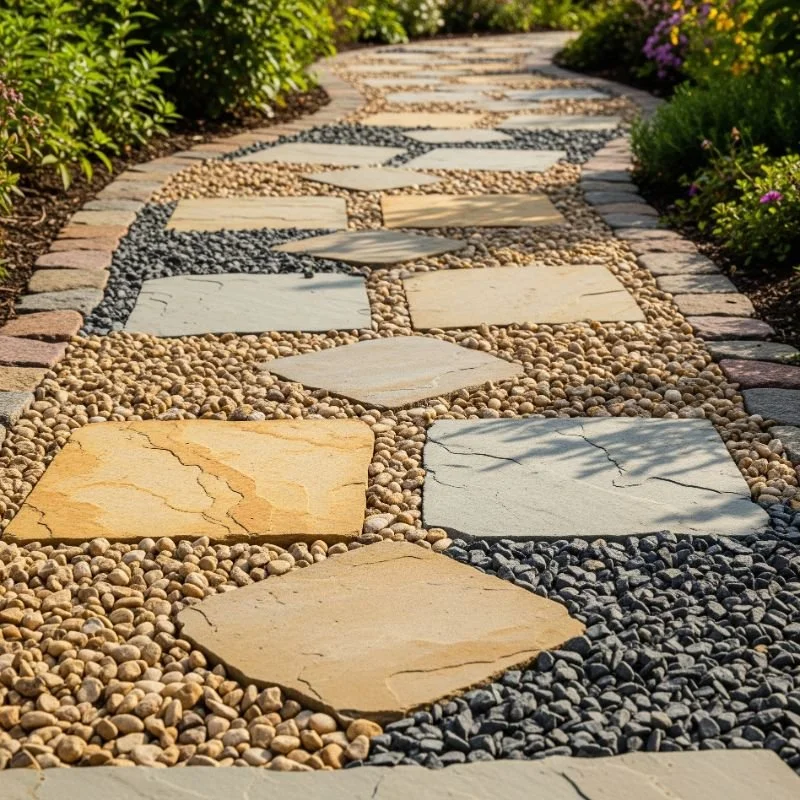
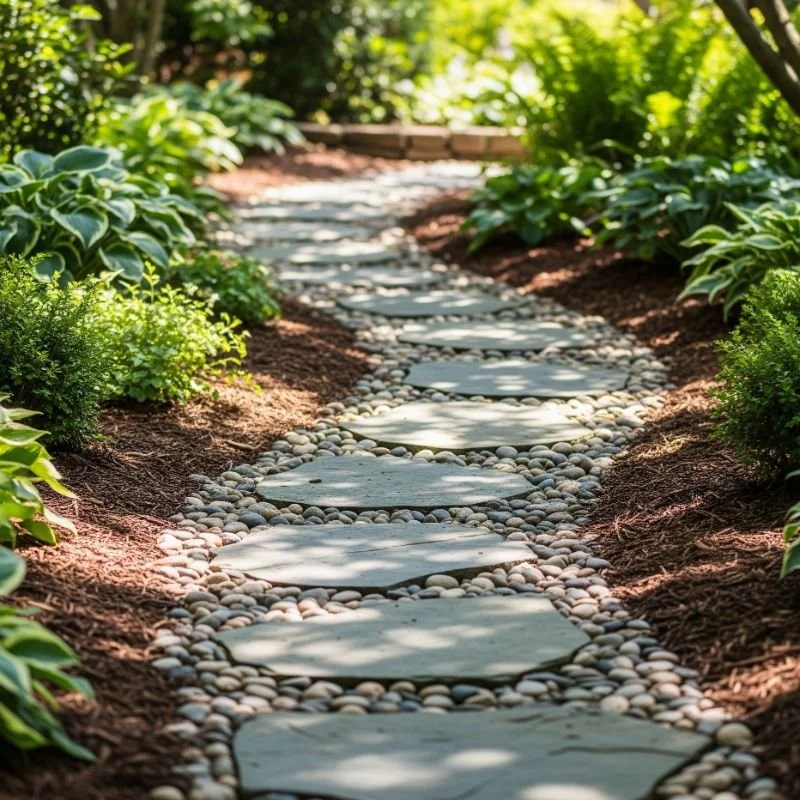
9. Gravel and Stone Combinations
Combine inexpensive pea gravel with strategically placed larger stones for permeable pathways that manage water naturally! Bulk gravel costs fraction of solid paving while providing stable walking surface. Place larger stepping stones at comfortable stride intervals through gravel base. This hybrid approach reduces stone needs by 70% while maintaining clear path definition. The gravel prevents mud between stones while allowing rain absorption. Choose contrasting colors like white stones in dark gravel for dramatic effect. Installation requires only basic tools and weekend labor. Add landscape fabric beneath to minimize weed growth. This flexible design allows easy modifications as garden evolves. The sound of crunching gravel adds sensory element to garden strolls.
10. Recycled Glass Aggregate Stones
Create sparkling stepping stones using recycled glass aggregate mixed into concrete for stunning light-catching effects! Tumbled glass from recycling centers costs little while adding incredible visual interest. Mix colored glass into concrete before pouring or press into surface for controlled designs. The smooth glass feels pleasant underfoot while creating rainbow reflections in sunlight. Use single colors for elegant monochrome or mix for carnival glass effects. This eco-friendly option keeps glass from landfills while beautifying your garden. Seal surface to prevent glass loosening over time. The unique appearance makes ordinary concrete extraordinary for minimal added cost. Each stone becomes functional art piece that guests always notice and admire.
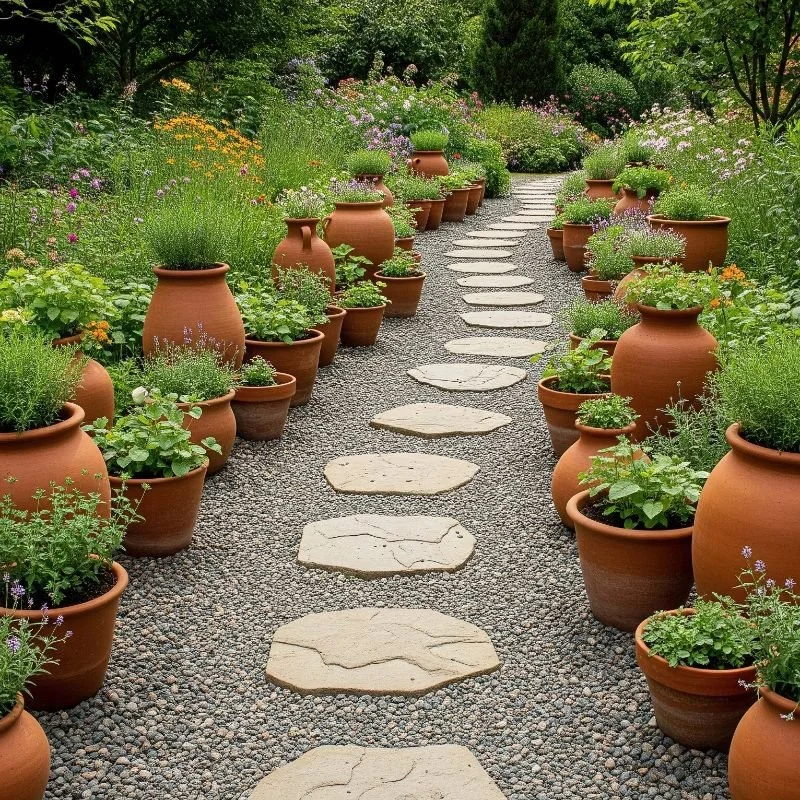
11. Terracotta Pot Walkways
Repurpose broken terracotta pots into charming Mediterranean-style pathways that cost nothing but creativity! Collect cracked pots from garden centers' trash or your own gardening mishaps. Break into large pieces and arrange like puzzle pieces for mosaic effect. The curved surfaces create interesting shadows and textures unique to this material. Set pieces in sand base with smaller fragments filling gaps. The warm terracotta color complements most garden palettes beautifully. This technique works especially well in herb or vegetable gardens for cohesive design. Weather naturally mellows sharp edges for safe walking. Replace individual pieces easily as more pots break. The recycled nature appeals to environmentally conscious gardeners seeking unique solutions.
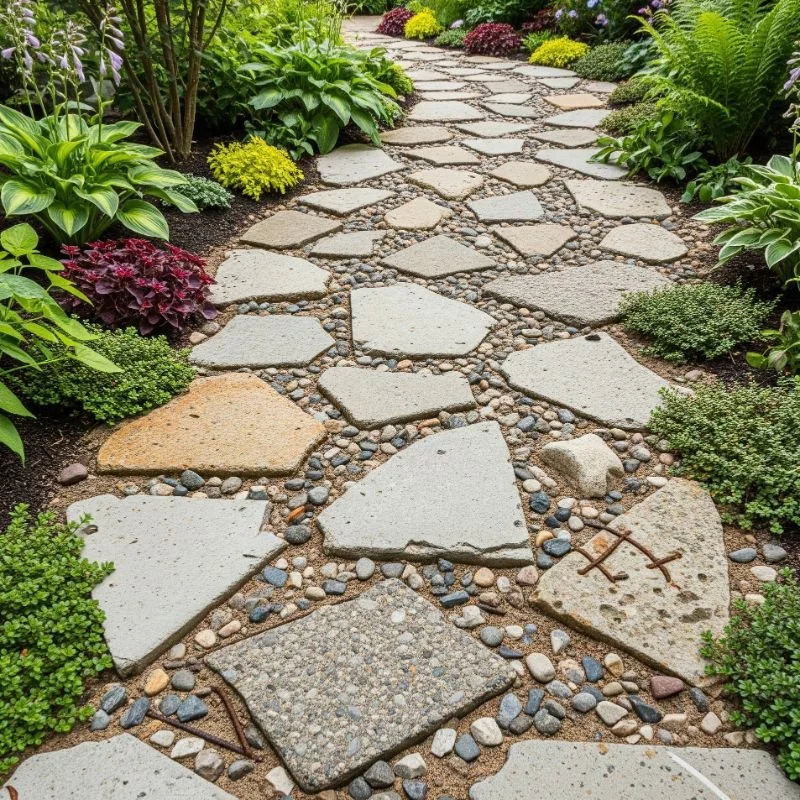
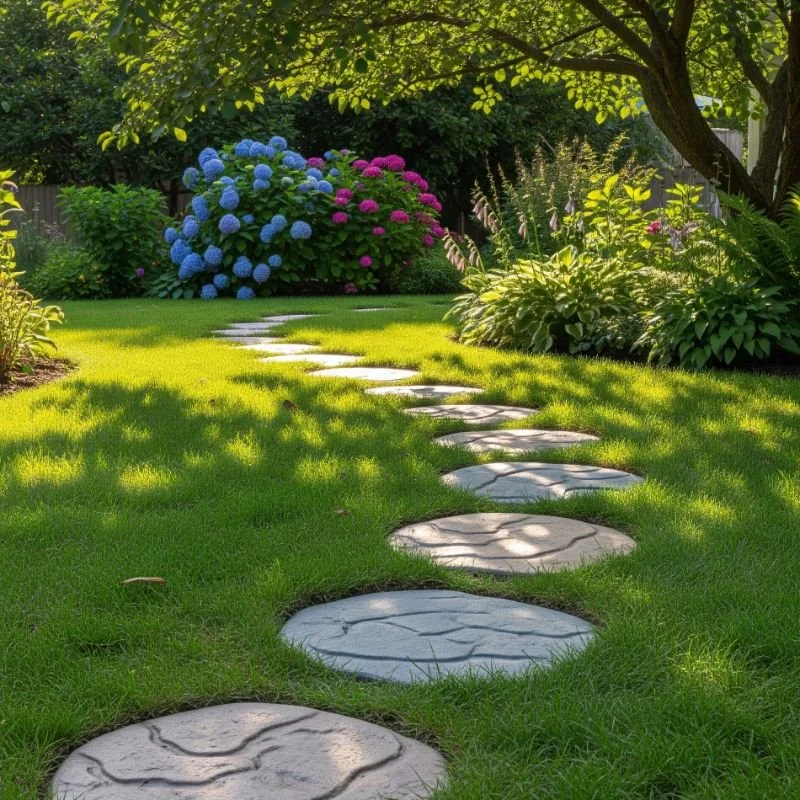
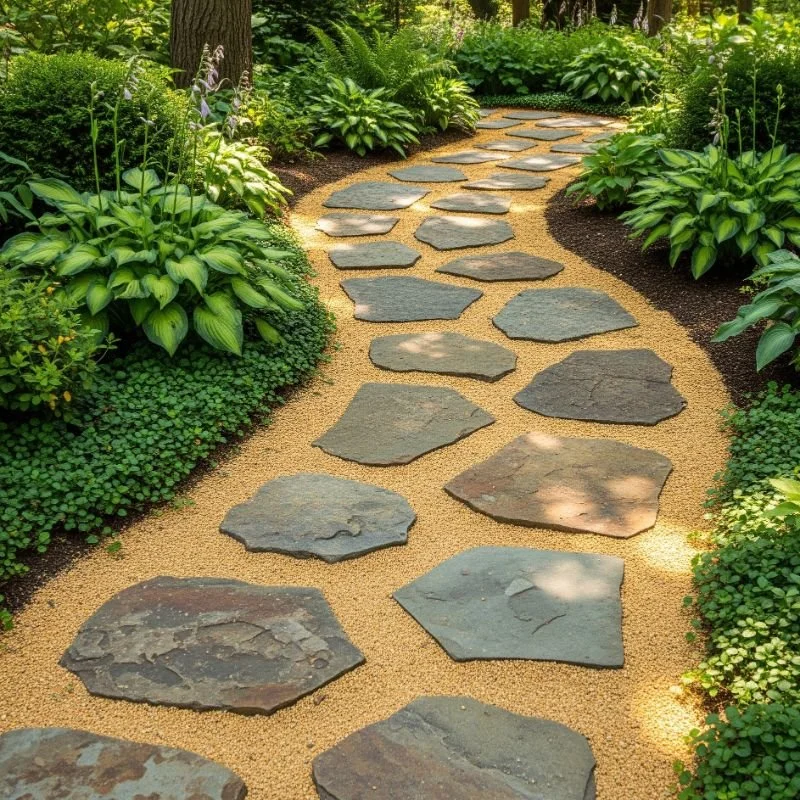
12. Sand-Set Flagstone
Source irregular flagstone pieces from landscape suppliers' remnant piles for natural stone paths at bargain prices! Leftover cuts and broken pieces sell for fraction of premium stone cost. Set directly in leveled sand base for stable yet adjustable installation. The irregular shapes create organic flow perfect for informal gardens. Fill joints with sand or plant creeping thyme for living grout. This classic technique requires no mortar or special skills beyond patience. Natural stone weathers beautifully while lasting generations with minimal care. Mix stone types for varied colors or stick to one for uniform appearance. The investment in quality material pays off through decades of enjoyment. Sand setting allows easy stone repositioning as needed.
13. Mulch and Stone Mix
Combine organic mulch with stepping stones for soft, natural pathways that blend seamlessly with planted areas! This approach reduces stone needs while creating comfortable walking surfaces between stones. Use wood chips, bark mulch, or shredded leaves as free or cheap fill material. Place stones at natural stride intervals through mulch base for clear path definition. The organic material suppresses weeds while retaining moisture for nearby plants. Refresh mulch annually for maintained appearance and continued weed control. This budget option works perfectly for woodland gardens or shaded areas. The soft mulch feels pleasant underfoot while muffling footstep sounds. Color coordinate mulch with stones for designed appearance or contrast for visual pop.
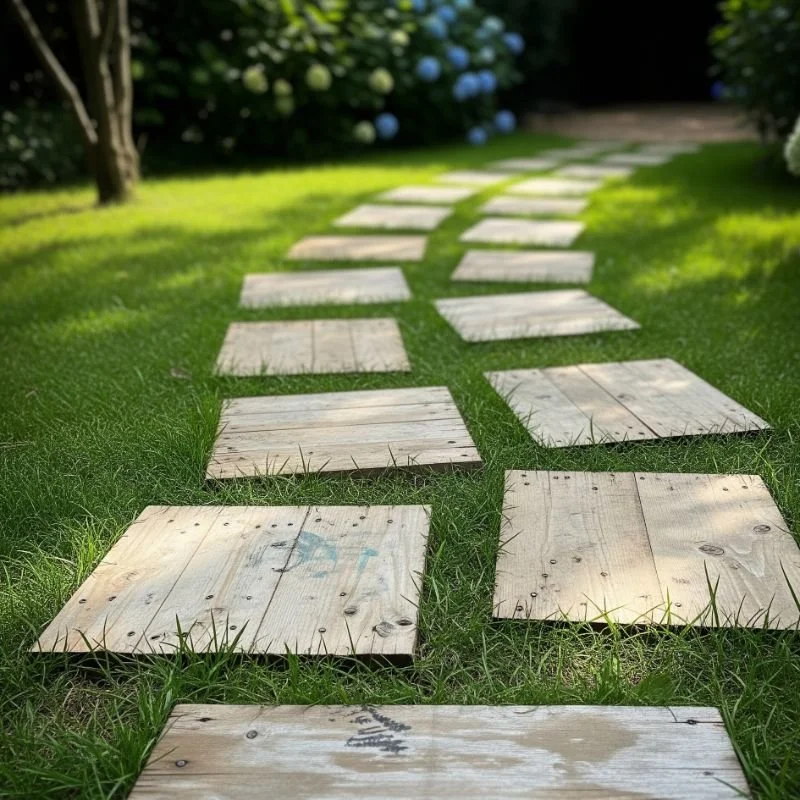
14. Pallet Wood Pathways
Transform free shipping pallets into rustic wooden walkways perfect for dry climates or covered areas! Disassemble pallets carefully to salvage usable boards for pathway construction. Treat wood with exterior preservative for weather resistance and longevity. Create sections that link together for adjustable path configurations. The industrial aesthetic suits modern gardens while wood warmth softens harsh landscapes. Sand smooth to prevent splinters and seal for easier maintenance. This lightweight option works well for temporary paths or rental properties. Stack extra boards for quick repairs as needed. The modular design allows easy relocation or reconfiguration as garden evolves. Cost remains minimal with free pallets and basic preservative treatment.
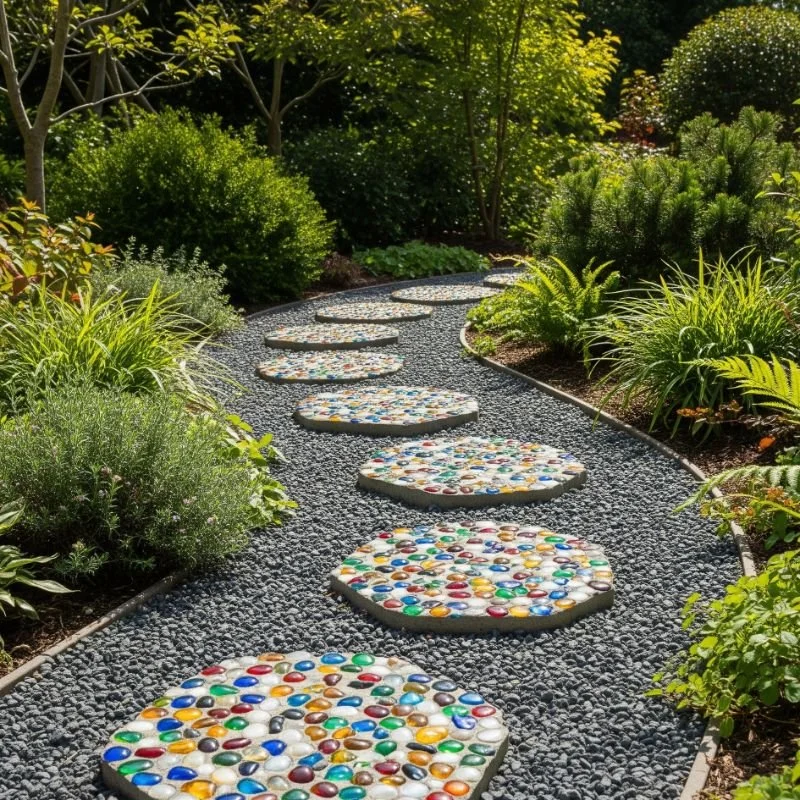
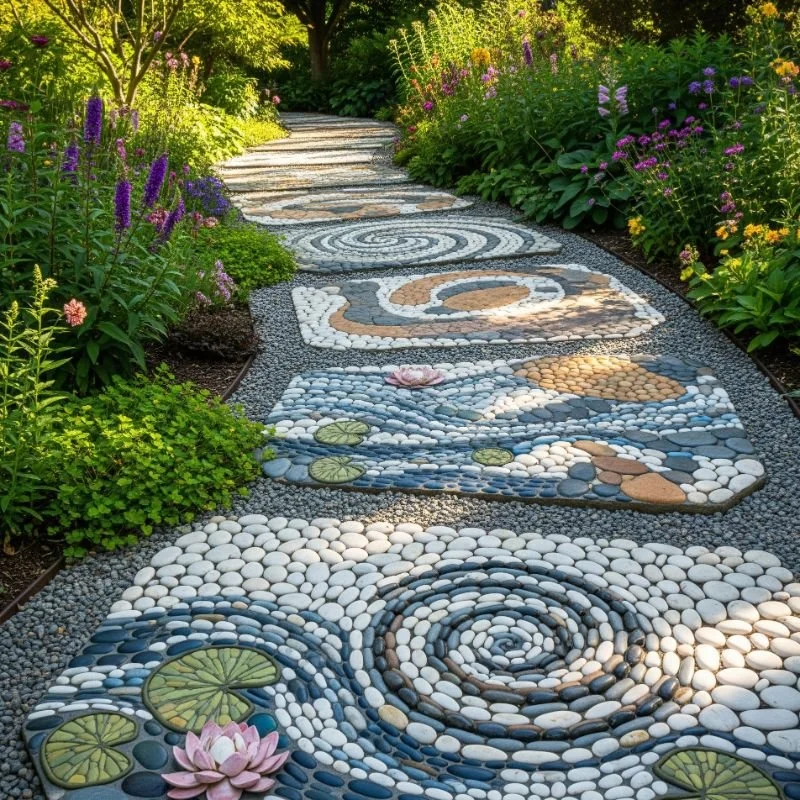
15. River Rock Mosaics
Collect smooth river rocks from legal gathering areas to create artistic pathway mosaics rivaling expensive installations! Sort rocks by size and color for planned designs or mix randomly for natural appeal. Set rocks on edge in concrete base for durable, textured walking surface. Create patterns like spirals, flowers, or geometric designs limited only by imagination. The smooth stones feel wonderful on bare feet while providing excellent traction. This labor-intensive method rewards patience with stunning, unique results. Each section becomes garden art that happens to be functional. Free rock collection makes material cost negligible despite high-end appearance. The finished pathways become conversation pieces that showcase your creativity and persistence.
Conclusion
Creating beautiful stepping stone walkways doesn't require emptying your savings or hiring professionals. These fifteen ideas prove that with creativity, some elbow grease, and smart material sourcing, you can build pathways that rival expensive installations. Whether you choose recycled materials, DIY concrete creations, or natural stones, the key is starting with what fits your budget and style. Your garden path awaits, and it doesn't have to cost a fortune to lead somewhere beautiful!
Read next: 15 Unique Stone Walkway Ideas to Inspire You
Frequently Asked Questions
Q1: How far apart should stepping stones be placed?
A1: Space stones 24 inches apart center-to-center for comfortable adult stride length and natural walking rhythm.
Q2: What's the best base material for stepping stones?
A2: Level sand provides ideal drainage and stability while allowing easy adjustments as ground settles naturally.
Q3: How long do DIY concrete stepping stones last?
A3: Properly made concrete stones last 20-30 years with occasional sealing every few years for protection.
Q4: Can stepping stones be installed over grass?
A4: Yes, cut grass beneath each stone and add sand base to prevent sinking and ensure stability.
Q5: What's the cheapest stepping stone option?
A5: Recycled concrete pieces cost nothing when salvaged from construction sites or demolition projects locally available.
Stay up to date with our latest ideas!