How to Build a Gravel Driveway: Step-by-Step Guide
Learn how to build a gravel driveway with our comprehensive guide. Save money with DIY tips, material choices, and expert installation techniques.

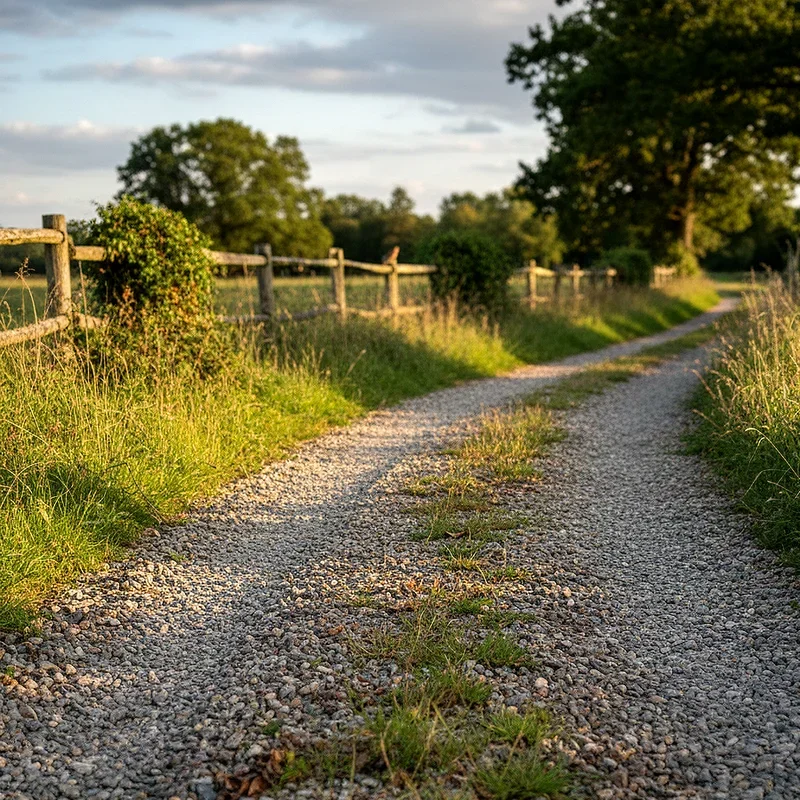
So, you're thinking about installing a gravel driveway? Well, you've come to the right place! Building a gravel driveway isn't rocket science, but it does require some planning, elbow grease, and knowing what you're getting yourself into. Whether you're tired of that muddy path leading to your garage or simply want a cost-effective alternative to asphalt or concrete, gravel driveways offer a rustic charm that's hard to beat. Plus, they're easier on the wallet and can last for years when done right. This guide will walk you through everything you need to know about creating a durable, attractive gravel driveway that'll make your neighbors jealous. From choosing the right materials to understanding proper drainage, we've got all the bases covered.
Why Choose a Gravel Driveway
Before jumping into the nitty-gritty, let's talk about why gravel driveways are worth considering. First off, they're incredibly budget-friendly compared to paved options. You won't need fancy equipment or specialized contractors for basic installations. Gravel also provides excellent drainage, which means no more standing water or ice patches during winter months. The permeable surface allows rainwater to seep through naturally, reducing runoff and helping the environment. Another bonus? That satisfying crunch sound when you drive over it. Talk about curb appeal! Gravel driveways work beautifully with various architectural styles, from country cottages to modern farmhouses. They're also surprisingly low maintenance when installed correctly, though they do need occasional refreshing.
Planning Your Gravel Driveway Project
Hold your horses! Before you start ordering materials, proper planning is essential. First, measure your driveway area carefully. You'll need accurate dimensions to calculate how much gravel to purchase. Consider the width based on your vehicle size and whether multiple cars need to pass each other. Standard driveways are typically 10 to 12 feet wide for single lanes and 20 to 24 feet for double lanes. Think about the slope and drainage patterns on your property. Water should flow away from buildings and not pool on the driveway surface. Check local building codes and regulations because some areas have specific requirements for driveway construction. You might need permits, especially if you're connecting to a public road. Sketch out your design, noting any curves or features you want to include. Planning ahead saves headaches later.
Gathering Essential Materials and Tools
Now we're talking! Getting the right stuff makes all the difference. For materials, you'll need three types of gravel: large base stones, middle-sized stones, and smaller top layer stones. The base layer typically uses stones 3 to 4 inches in diameter. The middle layer needs 1.5 to 2 inch stones. The top layer should be about 0.5 to 1 inch crushed gravel or pea gravel. Don't skimp on landscape fabric either because it prevents weeds and keeps layers separated. As for tools, grab a wheelbarrow, rake, shovel, tamper or plate compactor, measuring tape, stakes and string for marking, and safety gear including gloves and boots. A bobcat or small excavator makes digging easier if you're tackling a large area. Having everything ready before starting keeps the project moving smoothly.
Preparing the Ground Surface
This step is crucial, folks. Poor preparation leads to problems down the road, literally. Start by removing all grass, plants, roots, and topsoil from your driveway area. You want to dig down about 8 to 12 inches deep depending on soil conditions and expected traffic. Clay soil requires deeper excavation than sandy soil. Remove any large rocks or debris you encounter. Create a slight crown in the center of the driveway so water runs off to the sides. The crown should rise about 1 inch for every 10 feet of width. Use stakes and string to mark your boundaries and ensure straight lines or smooth curves. Grade the area so it slopes slightly away from buildings, typically about 1 to 2 percent grade. Compact the soil thoroughly using a tamper or plate compactor. This creates a stable foundation that won't shift or settle unevenly over time.
Installing Proper Drainage Solutions
Listen up because drainage can make or break your driveway. Without proper water management, you'll end up with erosion, ruts, and a muddy mess. If your property has poor drainage, consider installing a French drain along one or both sides of the driveway. This consists of a perforated pipe buried in gravel that redirects water away from the surface. For areas with heavy runoff, adding culverts under the driveway entrance prevents water from washing across the surface. Shape the edges so water flows off into vegetated areas or designated drainage zones. Some folks install drainage ditches or swales alongside their driveways. These work great for channeling water during heavy rains. The key is giving water somewhere to go that isn't across or under your gravel. Taking time to address drainage now saves major headaches later when you're not dealing with washouts after every storm.
Laying Down Landscape Fabric
Here's a step many beginners overlook, but it's super important. Landscape fabric acts as a barrier between your soil and gravel layers. It prevents weeds from pushing through while allowing water to drain. Roll out commercial-grade landscape fabric across your prepared base, overlapping seams by at least 6 inches. Secure the fabric with landscape staples every few feet. Make sure it covers the entire driveway area and extends slightly beyond the edges. Some people debate whether fabric is necessary, but trust me, it makes maintenance way easier. Without it, you'll be fighting weeds constantly and the gravel will gradually mix with the soil beneath. Choose a heavy-duty fabric rated for driveway use, not the flimsy stuff meant for flower beds. The investment pays off in reduced maintenance and longer driveway life. Once the fabric is secured, you're ready to start adding gravel layers.
Adding the Base Layer of Gravel
Time to get those big stones in place! The base layer is your foundation, so don't cut corners here. Pour or dump the large base stones onto the landscape fabric. These should be 3 to 4 inch diameter crushed rock or similar material. Spread them evenly across the entire driveway area using a rake or machinery. Aim for a depth of about 4 inches once compacted. The base layer provides structural support and helps with drainage. Work methodically from one end to the other, ensuring consistent coverage. Once spread, compact the base layer thoroughly using a plate compactor or heavy roller. Make several passes over the entire surface until the stones are firmly packed and stable. You should be able to walk on it without stones shifting beneath your feet. Pay extra attention to the edges because they tend to be weakest. This layer sets the stage for everything above it, so take your time and do it right.
Installing the Middle Layer
The middle layer is where things start coming together. Using stones between 1.5 and 2 inches, spread another layer about 3 to 4 inches deep over your compacted base. This layer fills gaps between the larger base stones and provides additional stability. Crushed stone works better than rounded river rock because the angular edges lock together. Spread evenly using a rake, maintaining that slight crown in the center for drainage. Once distributed, compact this layer just like you did the base. Multiple passes with a compactor ensure maximum stability. The middle layer shouldn't shift or feel loose when you walk on it. This intermediate size helps transition between the large base stones and the smaller surface layer you'll add next. Taking time to compact properly prevents future settling and rutting. When vehicles drive over your finished driveway, you want all three layers working together as one solid unit. Shortcuts here lead to problems later.
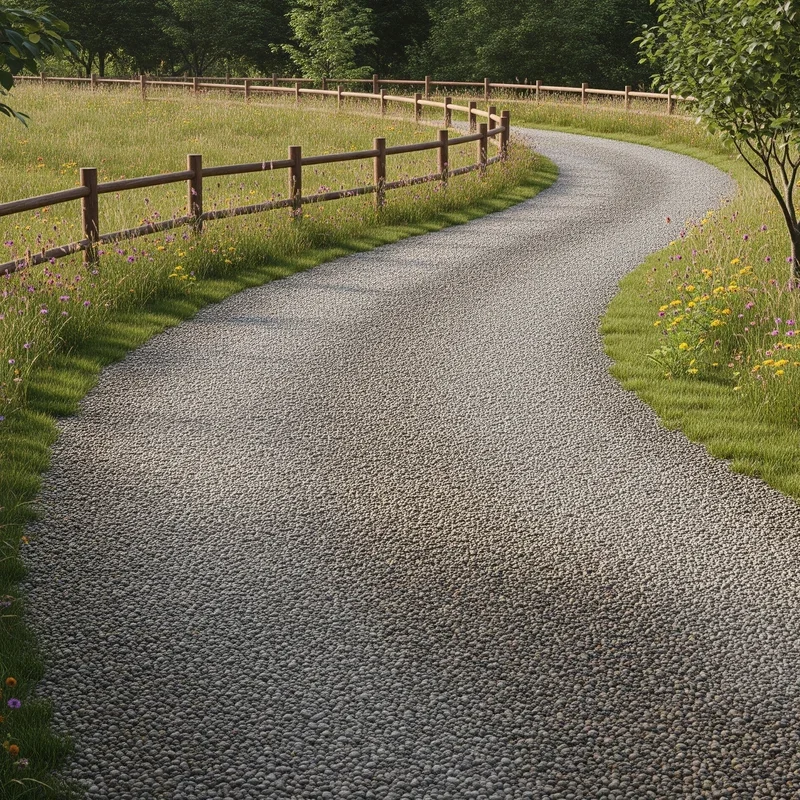
Applying the Top Surface Layer
Now for the finishing touch! Your top layer is what people see and drive on, so choose wisely. Pea gravel, crushed granite, or similar materials work well. This layer should be about 2 to 3 inches deep using stones roughly 0.5 to 1 inch in diameter. Spread evenly across the middle layer, maintaining that center crown. The smaller stones on top provide a smoother driving surface while still allowing excellent drainage. Some folks prefer angular crushed stone because it compacts better and shifts less. Others like the look of rounded pea gravel. Both work fine, though crushed stone typically requires less maintenance. After spreading, compact the surface layer thoroughly. This final compaction binds everything together. Walk the entire surface checking for low spots or inconsistencies. Add more material where needed and compact again. When finished, your How to Build a Gravel Driveway: Step-by-Step Guide project should have a smooth, stable surface that looks professional.
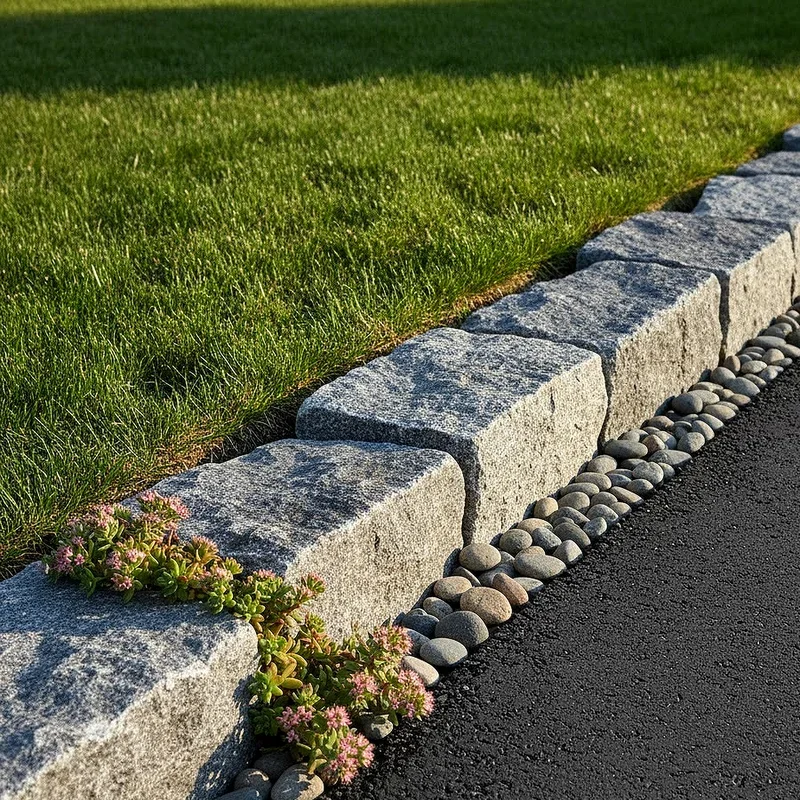
Creating Defined Edges and Borders
Edges keep your gravel where it belongs. Without proper edging, stones gradually spread into surrounding areas, making your driveway look messy and reducing its effective width. Several edging options exist depending on your budget and aesthetic preferences. Wooden landscape timbers offer a rustic look and are relatively inexpensive. Plastic or metal edging provides clean lines and durability. Stone or brick borders create an upscale appearance. For a natural look, some people simply compact the edges and maintain them with occasional trimming. Install edging by digging a shallow trench along the driveway perimeter. Set your chosen material firmly in place, ensuring it's slightly higher than the gravel surface. This prevents stones from escaping. Secure edging with stakes or spikes as needed. Well-defined edges not only look better but also make maintenance easier because you can clearly see the driveway boundaries when raking or adding fresh gravel.
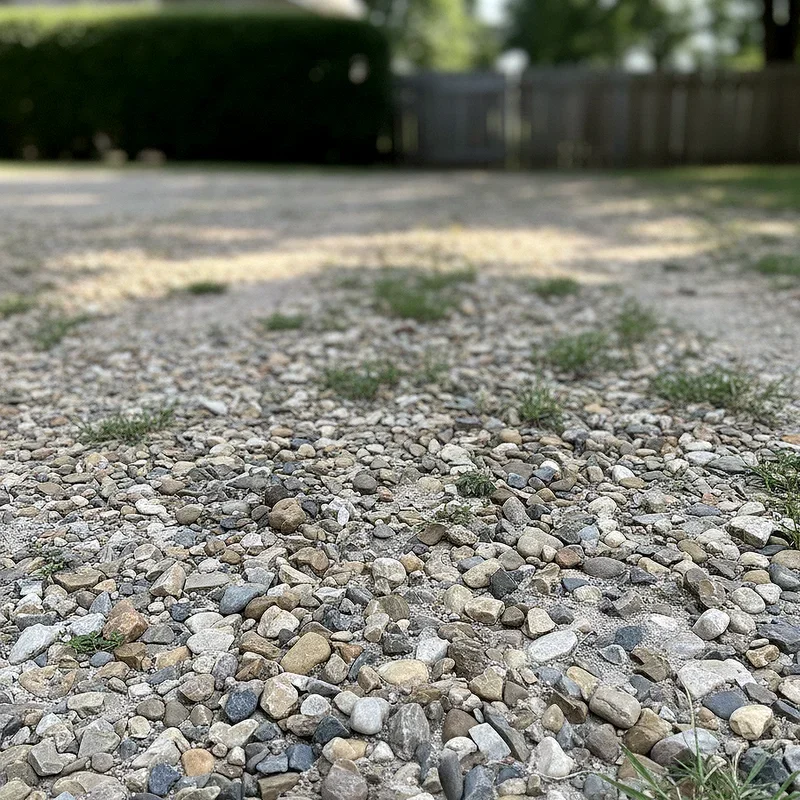
Understanding Gravel Types and Making Smart Choices
Not all gravel is created equal, folks. Choosing the right type for each layer affects durability, appearance, and maintenance requirements. Base layer options include crushed concrete, recycled asphalt, or large crushed stone. These provide maximum stability and drainage. For the middle layer, consider crushed stone, quarry process, or similar angular materials that compact well. Top layer choices include pea gravel for a smooth finish, crushed granite for durability, marble chips for elegance, or crusher run for maximum compaction. Colors range from neutral grays and browns to reds, whites, and mixed tones. Consider how the gravel color complements your home's exterior. Angular crushed stone generally performs better than smooth, rounded rock because the edges interlock. However, rounded stone looks attractive and feels comfortable underfoot. Local availability affects price significantly, so check what's readily available in your area. Using locally-sourced materials saves money on transportation costs.
Maintenance Tips for Long-Lasting Results
Congratulations, your driveway is complete! But the work doesn't stop there. Regular maintenance keeps it looking great and functioning properly. Rake the surface periodically to redistribute gravel and smooth out tire tracks or ruts. This prevents uneven wear patterns from developing. Add fresh gravel every year or two as needed because some material inevitably gets displaced or compacted. Address weeds promptly by pulling them or using appropriate herbicides. The landscape fabric helps, but some persistent weeds still push through. Fill potholes or low spots immediately before they worsen. Grade the edges occasionally to maintain defined boundaries. During winter, snow removal is easier on gravel than pavement, but avoid using sharp plows that gouge the surface. Instead, plow just above the gravel level or shovel by hand. Spring is a good time for major maintenance, adding fresh top layer gravel and regrading as needed. With proper care, your gravel driveway lasts decades.
Cost Considerations and Budget Planning
Let's talk money because that's often the deciding factor. Gravel driveways are significantly cheaper than asphalt or concrete alternatives. Expect to spend between three and five dollars per square foot for a basic gravel driveway installed yourself. Professional installation adds labor costs but ensures quality work. A typical single-car driveway might cost 600 to 1200 dollars for materials alone. Larger or longer driveways increase costs proportionally. Gravel prices vary by type and region, so get quotes from multiple suppliers. Renting equipment like plate compactors or excavators adds temporary costs but makes the job much easier. Consider whether you can borrow tools from friends or neighbors. Edging materials range from inexpensive to pricey depending on what you choose. While gravel requires more frequent maintenance than paved surfaces, the ongoing costs remain relatively low. Factor in periodic gravel replenishment when budgeting. Overall, the How to Build a Gravel Driveway: Step-by-Step Guide approach saves thousands compared to permanent paving options.

Common Mistakes to Avoid
Even experienced DIYers make mistakes, so learn from others' errors. Skipping the landscape fabric leads to weed problems and layer mixing. Not compacting properly causes settling, ruts, and an uneven surface. Using too little gravel, especially in the base layer, results in a weak driveway that fails under vehicle weight. Ignoring drainage creates washouts and erosion. Choosing the wrong gravel type affects both appearance and durability. Installing without proper edge restraints lets gravel spread everywhere. Not creating a center crown causes water pooling. Rushing through preparation by not removing enough topsoil or vegetation leads to future settling. Buying too much or too little material wastes money or requires additional trips. Not checking local codes might result in violations requiring expensive corrections. Taking shortcuts on compaction seems to save time but creates long-term problems. Following this guide carefully helps you avoid these common pitfalls and build a driveway you'll be proud of for years to come.
Conclusion
Building a gravel driveway is an achievable weekend project that delivers lasting value to your property. By following these steps carefully, from proper ground preparation through final surface compaction, you'll create a durable and attractive entrance. Remember that patience during installation prevents future headaches. Don't rush the compaction process, and choose quality materials appropriate for each layer. With regular maintenance, your new gravel driveway will serve you well for many years while complementing your home's character beautifully.
Read next: How Much to Pave a Driveway? Pricing Explained
Frequently Asked Questions
Q1: How deep should a gravel driveway be for residential use?
A: A residential gravel driveway should be 8 to 12 inches deep total across three layers.
Q2: Can I install a gravel driveway directly over grass without excavating?
A: No, you must remove grass and topsoil first to prevent settling, weeds, and structural problems.
Q3: How often does a gravel driveway need fresh stone added?
A: Most gravel driveways need fresh top layer stone added every one to three years depending.
Q4: What is the best gravel type for preventing ruts and potholes?
A: Angular crushed stone compacts best and resists rutting better than smooth, rounded pea gravel options.
Q5: Do gravel driveways work well in areas with heavy snow and ice?
A: Yes, gravel driveways handle winter weather well and provide better traction than paved surfaces typically.
Stay up to date with our latest ideas!