How to Sand a Deck the Right Way Step by Step
Learn how to sand a deck the right way step by step with expert tips, proper tools, and techniques for stunning results that last.

So, you're staring at that weathered deck of yours, thinking it's seen better days, right? Well, here's the thing: learning how to sand a deck the right way, step by step, isn’t rocket science, but it definitely takes a bit of patience and know-how. Maybe those splinters are poking through like tiny wooden fingers, or the finish has completely faded under years of sun and rain. Whatever the case, sanding your deck properly can breathe new life into your outdoor space and make it look brand new again. With the right tools, some elbow grease, and a clear plan, you’ll smooth out every rough patch and restore that beautiful natural wood grain. Trust me, your deck will shine—and your neighbors will definitely notice!
Why Sanding Your Deck Matters More Than You Think
Look, I get it. Sanding sounds about as exciting as watching paint dry, but here's where things get interesting. Your deck takes a beating year-round, dealing with everything Mother Nature throws at it. Rain, snow, blazing sun, you name it! All that exposure creates a rough, gray surface that's basically crying out for help.
When wood fibers get damaged, they stand up like little soldiers, creating that fuzzy, splintery texture nobody wants underfoot. Yikes! Not only does this make your deck look shabby, but it also prevents stains and sealers from doing their job properly. Think of sanding as giving your deck a fresh canvas, ready for protection and beautification.
Getting Your Ducks in a Row: Essential Tools and Materials
Before diving headfirst into this project, you've gotta gather your arsenal. Here's what you'll need:
Power sander (orbital or belt sander works great)
Sandpaper in various grits (60, 80, 100, and 120 grit)
Pole sander for those hard-to-reach spots
Shop vacuum or leaf blower
Safety goggles (your eyes will thank you!)
Dust mask or respirator
Work gloves
Extension cords if needed
Detail sander for railings and tight corners
Broom and dustpan
Pro tip: Don't cheap out on sandpaper! Quality stuff lasts longer and gives better results. It's like the difference between cutting tomatoes with a butter knife versus a chef's knife.
Prepping Your Deck: The Foundation of Success
Alright, rolling up your sleeves time! But hold your horses, we can't just start sanding willy-nilly. First things first, clear everything off that deck. And I mean everything! Furniture, planters, that rusty old grill that hasn't worked since 2015, all of it's gotta go.
Next up, give your deck a thorough inspection. Walking around, look for loose boards, popped nails, or screws sticking up. Hammer down those nails, tighten those screws, and replace any boards that are beyond salvation. There's no point putting lipstick on a pig, as they say!
Now comes the cleaning phase. Sweep away all the debris, leaves, and whatever else has accumulated. If your deck's really grimy, consider power washing it a few days before sanding. Just make sure it's completely dry before you start sanding, otherwise, you'll be fighting an uphill battle.

How to Sand a Deck the Right Way Step by Step: The Main Event
Here we go, folks! Time to get down to the nitty-gritty of how to sand a deck the right way step by step.
Step 1: Start with the Railings and Spindles
Counterintuitive as it might seem, starting with the vertical surfaces makes total sense. Why? Well, all that dust and debris will fall onto the deck surface, which you haven't sanded yet. Smart, huh?
Using a detail sander or sanding by hand, work your way around each spindle and railing. Yeah, it's tedious, but rushing through this part will show in the final result. Start with 80-grit sandpaper and work your way up to 100 or 120-grit for a smooth finish.
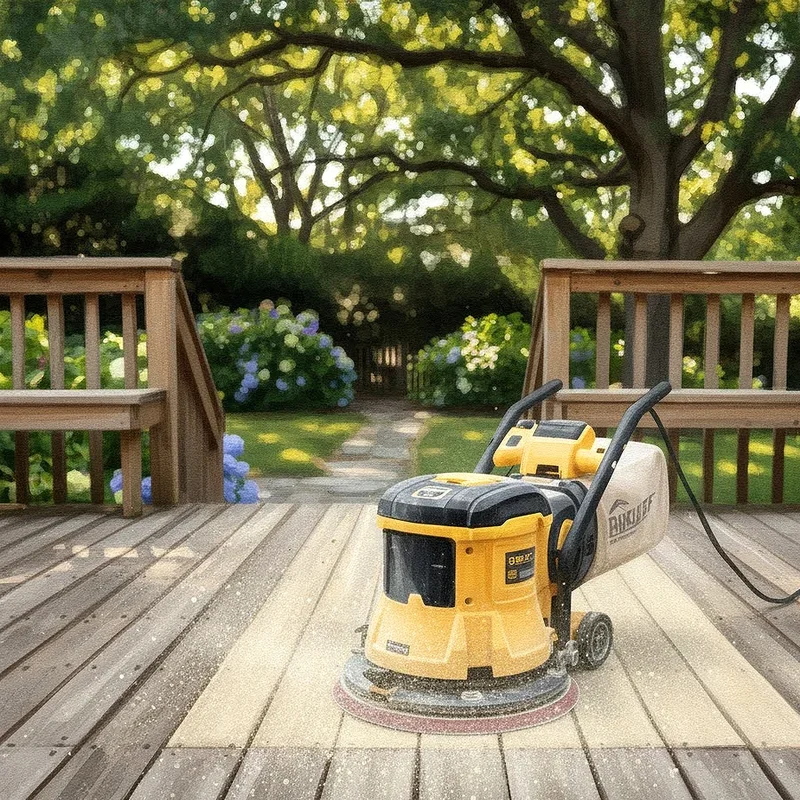
Step 2: Tackle the Deck Boards with Gusto
Now for the main attraction! Fire up that power sander and let's get to work. Starting with 60 or 80-grit sandpaper, sand along the grain of the wood, never against it. Going against the grain is like petting a cat backward; it just doesn't work out well for anyone involved!
Work systematically, overlapping your passes slightly to ensure even coverage. Don't park the sander in one spot, keep it moving! Staying in one place too long creates divots and uneven surfaces that'll haunt you later.
Step 3: Mind the Edges and Corners
Those pesky edges and corners where the big sander can't reach? That's where your detail sander or good old elbow grease comes in handy. Taking your time here pays dividends because these areas are often the most visible.
Step 4: The Second Pass Makes Perfect
Once you've gone over the entire deck with coarse grit, it's time for round two! Switch to a finer grit (100 or 120) and repeat the whole process. This second pass smooths out any roughness left behind and creates that silky-smooth surface that feels amazing underfoot.
Step 5: Between the Boards Needs Love Too
Oh boy, here's where things get a bit finicky. Those gaps between deck boards collect all sorts of gunk over the years. Using a thin piece of sandpaper or a special tool designed for this purpose, clean out these spaces. It's a pain in the neck, sure, but skipping this step leaves your deck looking half-finished.

The Art of Knowing When You're Done
How do you know when enough is enough? Well, running your hand along the wood should feel smooth as butter, with no rough patches or splinters waiting to attack unsuspecting bare feet. The wood should have a consistent appearance, without any gray weathered patches peeking through.
If you spot any areas that need more attention, don't be shy about giving them another pass. Better to spend an extra hour now than kick yourself later when the stain goes on unevenly!
Cleaning Up: The Unsung Hero of Deck Sanding
Phew! The sanding's done, but we're not quite finished yet. All that dust you've created? It's gotta go, every last speck of it! Start with a shop vacuum to suck up the bulk of the sawdust, paying special attention to the cracks between boards.
Following up with a leaf blower helps get those stubborn particles out of tight spots. Some folks even go the extra mile with a tack cloth or slightly damp mop to pick up the finest dust. Overkill? Maybe, but when you see how beautifully the stain goes on later, you'll pat yourself on the back!
Common Mistakes That'll Make You Want to Pull Your Hair Out
Let me save you some headaches by highlighting what not to do:
Sanding wet wood (patience, grasshopper!)
Using the wrong grit progression
Applying too much pressure with the sander
Ignoring the direction of wood grain
Skipping the cleanup between grits
Rushing through the process
Forgetting safety equipment
Timing Is Everything: When to Sand Your Deck
Picking the right time for this project isn't just about having a free weekend. Weather plays a huge role! You want several days of dry weather, both before and after sanding. Spring and early fall usually offer ideal conditions, not too hot, not too humid, just right like Goldilocks' porridge!
Avoid sanding in direct sunlight during the hottest part of the day. Not only will you feel like a baked potato, but the wood can get too hot, making the sandpaper less effective.
What Comes Next: Protecting Your Newly Sanded Masterpiece
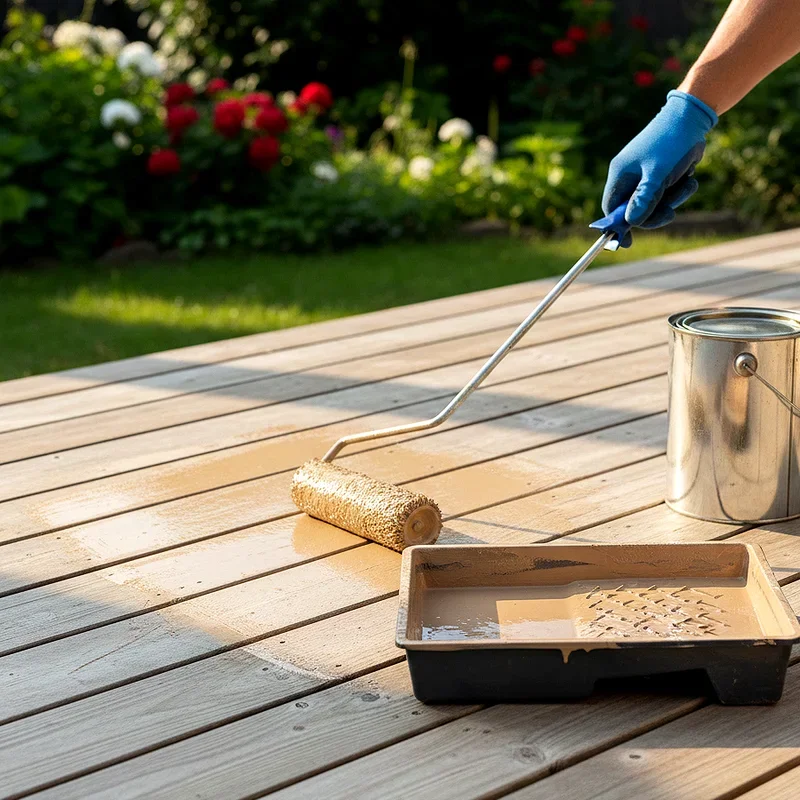
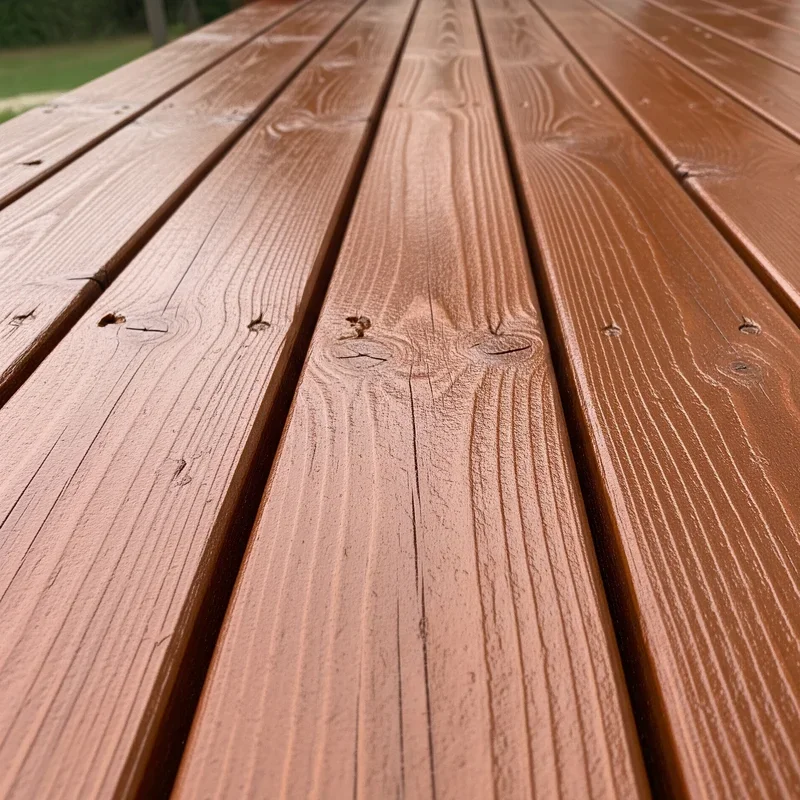
Once you've completed learning how to sand a deck the right way step by step, you've got a beautiful blank canvas ready for finishing. Within a day or two of sanding, apply your chosen stain or sealer. Waiting too long allows the wood to absorb moisture and dirt, undoing some of your hard work.
Choose a high-quality deck stain that offers UV protection and water resistance. Applying thin, even coats following the manufacturer's instructions will give you results that last for years, not months.
Maintenance Tips to Keep Your Deck Looking Sharp
After all that effort, you'll want to keep your deck looking its best:
Sweep regularly to prevent dirt buildup
Clean spills promptly
Rearrange furniture occasionally to prevent uneven wear
Inspect annually for signs of wear
Reapply sealer every 2-3 years
Address problems quickly before they worsen
Conclusion
Sanding your deck might seem like a mammoth task at first glance, but breaking it down step by step makes it totally manageable! With patience, the right tools, and this guide in your back pocket, you're well-equipped to transform that weathered deck into an outdoor oasis. Remember, taking your time and doing it right the first time beats having to redo shoddy work any day of the week!
Read next: 15 Deck Bench Ideas for a Cozy and Functional Outdoor Space
Frequently Asked Questions
Q1: How often should I sand my deck?
A: Every 2-3 years, depending on wear and weather exposure conditions.
Q2: Can I sand a deck in humid weather?
A: No, wait for dry conditions with humidity below 70% ideally.
Q3: What grit sandpaper should I start with?
A: Begin with 60-80 grit for weathered wood, 100 for maintained decks.
Q4: Is hand sanding better than power sanding?
A: Power sanding saves time and energy while providing more consistent results.
Q5: How long does sanding a deck typically take?
A: A 300-square-foot deck usually takes 6-10 hours of actual sanding work.
Stay up to date with our latest ideas!